AsciiDoc Basics
Bold, Italic, and Code Styles
A bold *word*, a *bold phrase*, and bold c**hara**cter**s**.

An italic _word_, an _italic phrase_, and italic c__hara__cter__s__.

A monospace `word`, a `monospace phrase`, and monospace c``hara``cter``s``.

`*_monospace bold italic phrase_*` and ``**__char__**``acter``**__s__**``
Rendered as:
A bold word, a bold phrase, and bold characters.
An italic word, an italic phrase, and italic characters.
A monospace word, a monospace phrase, and monospace characters.
monospace bold italic phrase and characters
You can add multiple inline styles to text as long as the syntax is placed in the correct order.
-
Monospace syntax (
`) is always the outermost formatting set. -
Bold syntax (
*) must be outside the italic formatting set. -
Italic syntax (
_) is always the innermost formatting set.
To mark up code blocks, include example files, and add callouts, see Code Blocks and Callouts.
Button, Keyboard, and Menu UI Macros
Click the btn:[Submit] button.

Press kbd:[esc] to exit insert mode.

You can cancel a running query by using the kbd:[Ctrl+C] keys.

In the tool bar, select menu:File[Save].

Select menu:View[Zoom > Reset] to reset the zoom level.
Rendered as:
Click the Submit button.
Press esc to exit insert mode.
You can cancel a running query by using the Ctrl+C keys.
In the tool bar, select .
Select to reset the zoom level.
URLs
Don’t use URLs or system paths to link between docs.couchbase.com documents. Document-to-document links are created with cross references to ensure domain, component, and version portability.
File bugs at https://issues.couchbase.com.

Join the https://gitter.im/antora/users[Antora chat room] to meet and get help from the community.
Rendered as:
File bugs at https://issues.couchbase.com.
Join the Antora chat room to meet and get help from the community.
Escaping URLs
When a URL should be inactive, you can escape it by placing a backslash (\) directly in front of it.
To style and escape a URL, use the + passthrough inside any inline style markup.
If it is not specified, the default URL \http://localhost:8091 is used.

If it is not specified, the default URL `+http://localhost:8091+` is used.
Rendered as:
If it is not specified, the default URL http://localhost:8091 is used.
If it is not specified, the default URL http://localhost:8091 is used.
URL Best Practices
-
Always use
https://for external webpage links. -
Escape
http://localhostURLs in regular text so they don’t become links. -
Create attributes for long URLs to improve the source readability for other contributors.
-
Create attributes for URLs that contain sets of symbols, such as multiple underscores (
_) and backticks (`), that could be misinterpreted as inline markup. -
Create attributes for URLs used several times on the same page.
-
Don’t use URLs for linking between documentation pages or to in-page anchors.
Checklists
* [*] checked
* [x] also checked
* [ ] not checked
Rendered as:
-
checked
-
also checked
-
not checked
Description Lists
Bucket:: A drop-down menu that displays the name of the bucket whose documents are currently being viewed.
You can use the drop-down menu to select other available buckets.
Limit:: The maximum number of rows (documents) to retrieve and display at once.
Document ID:: Accepts the ID of a specific document.
Leave this field blank to retrieve documents based on *Limit* and *Offset*.
Rendered as:
- Bucket
-
A drop-down menu that displays the name of the bucket whose documents are currently being viewed. You can use the drop-down menu to select other available buckets.
- Limit
-
The maximum number of rows (documents) to retrieve and display at once.
- Document ID
-
Accepts the ID of a specific document. Leave this field blank to retrieve documents based on Limit and Offset.
term 1::
This description needs two paragraphs.
To attach them both to term 1, use a list continuation (`+`) on the line separating the paragraphs.
+
This is the second paragraph for term 1.

term 2::
This description includes an admonition block.
Like additional paragraphs, blocks also need to be connected with a `+`.
+
NOTE: An admonition block that is part of term 2's description.

term 3::
* unordered list item
.. ordered list item
... another ordered list item
Rendered as:
- term 1
-
This description needs two paragraphs. To attach them both to term 1, use a list continuation (
+) on the line separating the paragraphs.This is the second paragraph for term 1.
- term 2
-
This description includes an admonition block. Like additional paragraphs, blocks also need to be connected with a
+.An admonition block that is part of term 2’s description. - term 3
-
-
unordered list item
-
ordered list item
-
another ordered list item
-
-
-
Ordered Lists
. Step 1, Level 1
.. Step 1, Level 2
... Step 1, Level 3
.... Step 1, Level 4
..... Step 1, Level 5
. Step 2
Rendered as:
-
Step 1, Level 1
-
Step 1, Level 2
-
Step 1, Level 3
-
Step 1, Level 4
-
Step 1, Level 5
-
-
-
-
-
Step 2
Unordered Lists
* Level 1
** Level 2
*** Level 3
**** Level 4
***** Level 5
* Level 1
Rendered as:
-
Level 1
-
Level 2
-
Level 3
-
Level 4
-
Level 5
-
-
-
-
-
Level 1
Navigation files also use the unordered list syntax.
Images
The block image macro (image::[]) and the inline image macro (image:[]) accept SVG, PNG, JPG/JPEG, and GIF file formats.
Block images, indicated by two colons (::), are entered on their own line and displayed on their own line.
Optional attributes and values are entered inside the macro’s attribute list ([]).
In the block image example, the first positional value is empty, so the opening square bracket ([) is directly followed by a comma (,).
The second positional value, 280, indicates the maximum width of the image.
The next attribute, align, and its assigned value left, places the image against the left page margin.
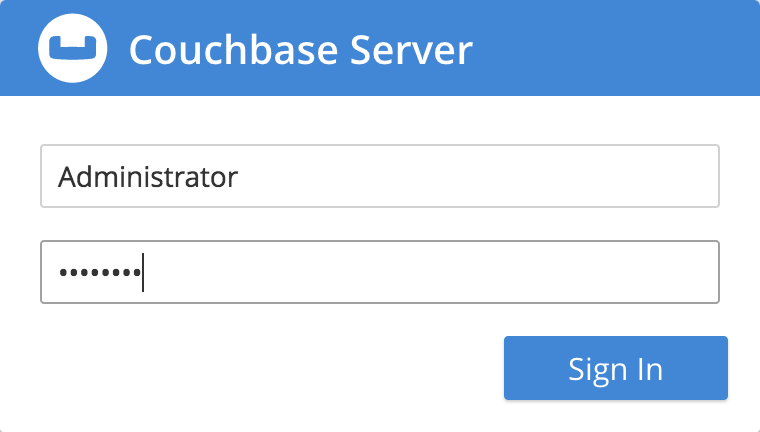
If the macro’s attribute list is empty (e.g., image::filename.jpg[]), the image is displayed at its original size and centered on the page.
image::console-login.png[,280,align=left]
Rendered as:
The inline image macro, indicated by a single colon (:), is used for displaying small images and icons directly in the flow of a sentence.
Click the image:edit.svg[,16] icon.
Rendered as:
Click the ![]() icon.
icon.
Admonitions
There are five built-in admonition labels.
-
NOTE
-
TIP
-
IMPORTANT
-
CAUTION
-
WARNING
TIP: Positional parameters are set using the `-args` query parameter.

NOTE: Once a node has been successfully added, the Couchbase Server cluster indicates that a rebalance is required to complete the operation.

IMPORTANT: The node names passed to the `nodes` parameter must include the cluster administration port (by default 8091).
For example `WITH {"nodes": ["192.0.2.0:8091"]}` instead of `WITH {"nodes": ["192.0.2.0"]}`.

WARNING: Never stop or restart Couchbase Server before you first remove that node from a cluster.

CAUTION: Don't stick forks in power sockets.
Rendered as:
Positional parameters are set using the -args query parameter.
|
| Once a node has been successfully added, the Couchbase Server cluster indicates that a rebalance is required to complete the operation. |
The node names passed to the nodes parameter must include the cluster administration port (by default 8091).
For example WITH {"nodes": ["192.0.2.0:8091"]} instead of WITH {"nodes": ["192.0.2.0"]}.
|
| Never stop or restart Couchbase Server before you first remove that node from a cluster. |
| Don’t stick forks in power sockets. |
[IMPORTANT]
.Optional Title
====
Use an example block to create an admonition that contains compound content, such as:

* Lists
* Multiple paragraphs
* Source code
====
Rendered as:
|
Optional Title
Use an example block to create an admonition that contains compound content, such as:
|
A compound admonition is any admonition block that contains more than one paragraph or contains a block other than a paragraph. The contents of the block must be wrapped in the example block delimiters and the admonition type must be assigned as the block style.
Tables
Tables are delimited by |=== (a vertical bar followed by three equals signs).
The number of columns in a table is determined by the number of cells found in the first non-blank line after the table delimiter (|===) or by the values assigned to the cols attribute.
A new cell is created each time the processor encounters a vertical bar (|).
Cells are grouped into rows.
Each row must share the same number of cells, taking into account any column or row spans.
|=== (1)
|Name of Column 1 |Name of Column 2 (2) (3)

|Cell in column 1, row 1
|Cell in column 2, row 1 (4)

|Cell in column 1, row 2 |Cell in column 2, row 2 (5)
|===
| 1 | A table is delimited by |===. |
| 2 | When a cell, marked by a vertical bar (|), is placed on the line directly below the delimiter, it is interpreted as a header row. |
| 3 | The number of cells found in the header row indicates the number of columns (sets cols implicitly). |
| 4 | The cells in a row can be entered on separate lines. |
| 5 | The cells in a row can be entered on the same line. |
Rendered as:
| Name of Column 1 | Name of Column 2 |
|---|---|
Cell in column 1, row 1 |
Cell in column 2, row 1 |
Cell in column 1, row 2 |
Cell in column 2, row 2 |
Since tables are AsciiDoc block elements they can have titles, roles, IDs, as well as table-specific attributes.
cols, and options="header".Optional title [#optional-id,cols="1,1,2",options="header"] (1) (2) (3) (4) |=== |Name of Column 1 |Name of Column 2 |Name of Column 3 |Cell in column 1, row 1 |Cell in column 2, row 1 |Cell in column 3, row 1 |Cell in column 1, row 2 |Cell in column 2, row 2 |Cell in column 3, row 2 |===
| 1 | If assigned, an ID must be set first in the table’s attribute list. |
| 2 | The number of values assigned to cols indicates the number of columns, in this case, the table has three columns. |
| 3 | The proportion of each value assigned to cols relative to its other values indicates the width of each column.
In this example, column 1 and column 2 will be half the width of column 3. |
| 4 | To make the first row a header row, assign header to the options attribute. |
Rendered as:
| Name of Column 1 | Name of Column 2 | Name of Column 3 |
|---|---|---|
Cell in column 1, row 1 |
Cell in column 2, row 1 |
Cell in column 3, row 1 |
Cell in column 1, row 2 |
Cell in column 2, row 2 |
Cell in column 3, row 2 |
Here’s an example of a table with a title, implicit header row, and the proportional width of the two columns set.
.CLI parameters for adding a node
[cols="1,2"]
|===
|Parameter |Description

|`--cluster`
|The IP address of a node in the existing cluster.

|`--user`
|The username for the existing cluster.

|`--password`
|The password for the existing cluster.
|===
Rendered as:
| Parameter | Description |
|---|---|
|
The IP address of a node in the existing cluster. |
|
The username for the existing cluster. |
|
The password for the existing cluster. |
Block Elements in Tables
Any block-level elements, such as code blocks, lists, admonitions, etc., can be entered into a cell.
However, the specifier a (which stands for AsciiDoc) must be placed on the cell, row, or column in order for them to be processed as AsciiDoc blocks.
In the following example, the a specifier is placed on the cells containing block elements.
.cbq Shell Commands
[#table-cbq-shell-commands,cols="1,2,4"]
|===
|Shell Command |Arguments |Description and Examples

|`\SET`
|`parameter=prefix:variable name`
a|
Sets the top most value of the stack for the given variable with the specified value.

Variables can be of the following types:

[#set-var-types]
* Query parameters
* Session variables
* User-defined
* Pre-defined and named parameters.

|`\PUSH`
|`parameter value`
a|
Pushes the specified value on to the given parameter stack.

----
cbq> \PUSH -args  [8];
----

.Resulting variable stack
----
cbq> \SET;
 Query Parameters :
 Parameter name : args
 Value : [[6,7] [8] [8]]
...
cbq>
----
|===
Rendered as:
| Shell Command | Arguments | Description and Examples |
|---|---|---|
|
|
Sets the top most value of the stack for the given variable with the specified value. Variables can be of the following types:
|
|
|
Pushes the specified value on to the given parameter stack. cbq> \PUSH -args [8]; Resulting variable stack
cbq> \SET; Query Parameters : Parameter name : args Value : [[6,7] [8] [8]] ... cbq> |
Column and Row Spans
The span factor is the number of columns or rows, including the starting row or column, the cell should span.
-
To have a cell span multiple columns, place the span factor and
+operator directly before the|of the starting cell. -
To span multiple rows, place a dot (
.) directly before the span factor and+operator.
|===

|Cell in column 1, row 1 |Cell in column 2, row 1 |Cell in column 3, row 1

3+|Content in a single cell that spans columns 1, 2, and 3

|Cell in column 1, row 3
|Cell in column 2, row 3
|Cell in column 3, row 3

.2+|Content in a single cell that spans rows 4 and 5
|Cell in column 2, row 4
|Cell in column 3, row 4

|Cell in column 2, row 5
|Cell in column 3, row 5
|===
Rendered as:
Cell in column 1, row 1 |
Cell in column 2, row 1 |
Cell in column 3, row 1 |
Content in a single cell that spans columns 1, 2, and 3 |
||
Cell in column 1, row 3 |
Cell in column 2, row 3 |
Cell in column 3, row 3 |
Content in a single cell that spans rows 4 and 5 |
Cell in column 2, row 4 |
Cell in column 3, row 4 |
Cell in column 2, row 5 |
Cell in column 3, row 5 |
|
Table Widths
The default width for a table is set to 100%. There are three ways to override this default:
-
Set the width explicitly (in percentage) using the width attribute (e.g., width=50%)
-
Set the autowidth option so that table only expands to accommodate the contents (e.g., %autowidth)
-
Assign a role to the table to allow the width to be controlled by CSS using presets (e.g., .narrow)
For more information, see the Asciidoctor table width documentation.
Table Attributes and Options
There are a lot of AsciiDoc table attributes, options, and specifiers. For more examples and information, see the Asciidoctor table documentation.
Additional Resources
You can find more AsciiDoc examples in the Pages category of the Antora documentation.