REST API Client
Whether you’re developing a web application getting data from the Sync Gateway API or integrating it with another system you will almost certainly need an HTTP library to consume the Public and Admin Sync Gateway REST APIs. The documentation for the Sync Gateway REST APIs is using Swagger which is a great toolkit for writing REST API documentation, and also to generate HTTP libraries. This guide will walk you through how to start using those libraries to display documents stored in Sync Gateway on a web page
Follow the steps below to get Sync Gateway up and running.
-
In a new working directory, open a new file called
sync-gateway-config.jsonwith the following{ "log": ["HTTP+"], "CORS": { "origin":["http://localhost:8000"], "loginOrigin":["http://localhost:8000"], "headers":["Content-Type"], "maxAge": 1728000 }, "databases": { "todo": { "server": "walrus:", "users": { "GUEST": {"disabled": false, "admin_channels": ["*"] } } } } }Here, you’re enabling CORS on
http://localhost:8000, the hostname of the web server that will serve the web application. -
Start Sync Gateway from the command line with the configuration file.
~/Downloads/couchbase-sync-gateway/bin/sync_gateway sync-gateway-config.json -
Insert a few documents using the POST
/{db}/_bulk_docsendpoint.curl -X POST http://localhost:4985/todo/_bulk_docs \ -H "Content-Type: application/json" \ -d '{"docs": [{"task": "avocados", "type": "task"}, {"task": "oranges", "type": "task"}, {"task": "tomatoes", "type": "task"}]}'
A Simple Web Application
In this section you will use Swagger JS in the browser to insert a few documents and display them in a list. Create a new file called index.html with the following.
<!DOCTYPE html>
<html lang="en">
<head>
  <meta charset="UTF-8">
  <title>Todos</title>
</head>
<body>
  <h2>Todos</h2>
  <ul id="list"></ul>
</body>
<script src="swagger-client.min.js"></script>
<script src="index.js"></script>
</html>
Install the swagger-js library in your working project.
Next, create a new file called index.js to start sending requests to Sync Gateway.
// initialize swagger client, point to a swagger spec
window.client = new SwaggerClient({
  url: 'http://developer.couchbase.com/mobile/swagger/sync-gateway-public/spec.json',
  usePromise: true
})
  .then(function (client) {
    client.help();
  });
Here you’re initializing the Swagger library with the Sync Gateway public REST API spec and promises enabled. Promises are great because you can chain HTTP operations in a readable style.
Keep in mind that in this example the Swagger client is pointing to the spec hosted on developer.couchbase.com.
We often publish changes to those specs for documentation purposes; if it’s a breaking change then it will modify the request and parameter names in the Swagger client and break your code.
You can refer to the changelog of the specs to find the list of methods and parameters that changed.
In production, we highly encourage you to download the spec as a .json file and pass it to the Swagger client using the {spec: <spec>} option.
|
In this working directory, start a web server with the command python -m SimpleHTTPServer 8000 and navigate to http://localhost:8000/index.html in a browser.
Open the dev tools to access the console and you should see the list of operations available on the client object.
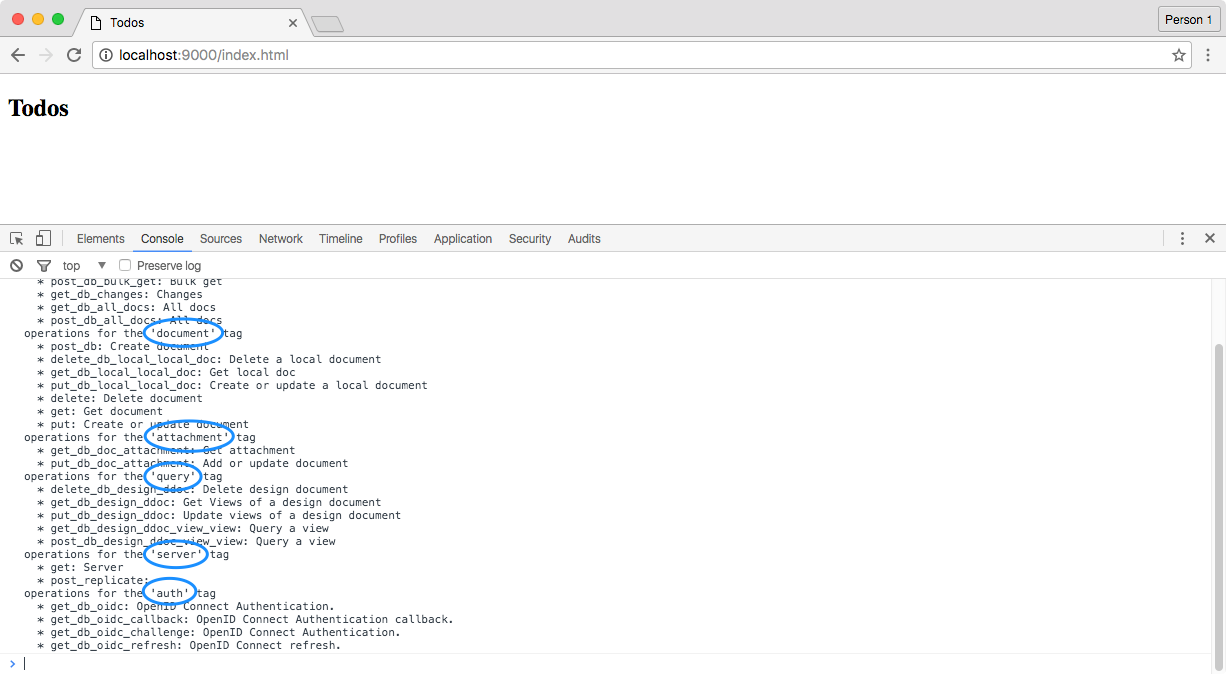
All the endpoints are grouped by tag. A tag represents a certain functionality of the API (i.e., database, query, authentication).
The client.help() method is a helper function that prints all the tags available.
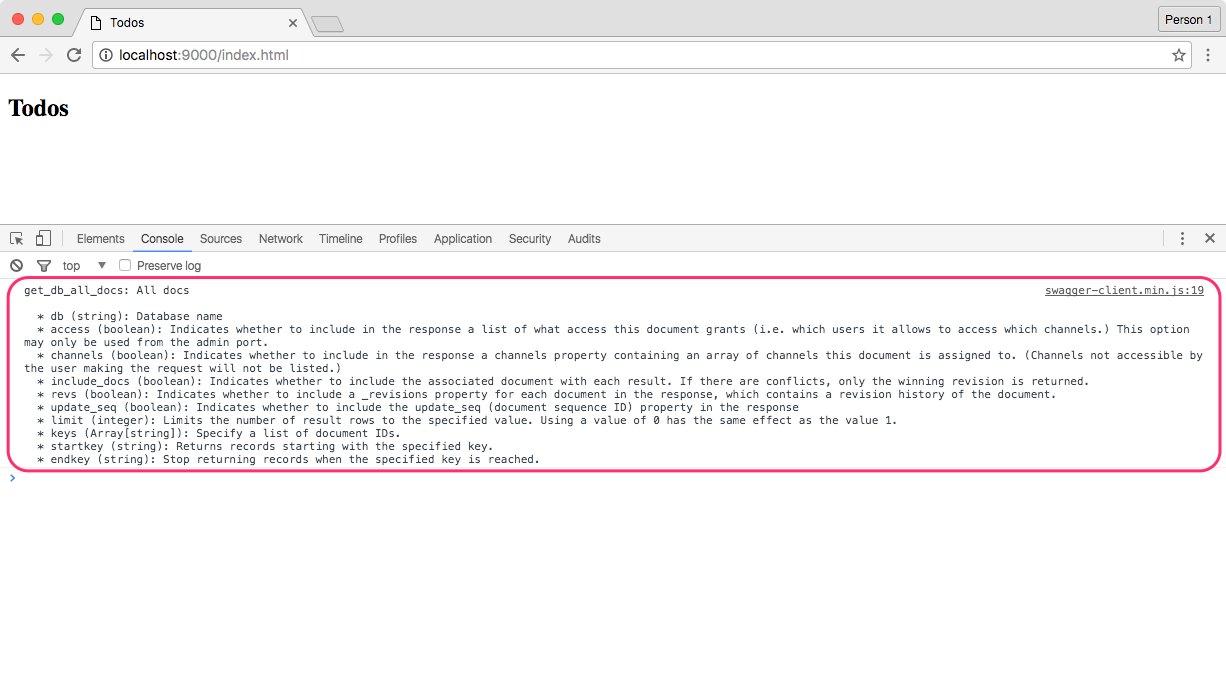
In this case we’d like to query all documents in the database so we’ll use the get_db_all_docs method on the database tag to perform this operation.
The helper function is available on any node of the API, so you can write client.database.get_db_all_docs.help() to print the documentation for that endpoint as shown below.
Copy the following below the existing code in index.js to query all the documents in the database and display them in the list.
client.query.get_db_all_docs({db: 'todo', include_docs: true})
  .then(function (res) {
    var rows = res.obj.rows;
    var list = document.getElementById('list');
    for (var i = 0; i < rows.length; i++) {
      var item = document.createElement('li');
      item.innerText = rows[i].doc.task;
      list.appendChild(item);
    }
  })
  .catch(function (err) {
    console.log(err);
  })
The include_docs option is used to retrieve the document properties (the text to display on the screen is located on the doc.task field).
A promise can either be fulfilled with a value (the successful response) or rejected with a reason (the error response).
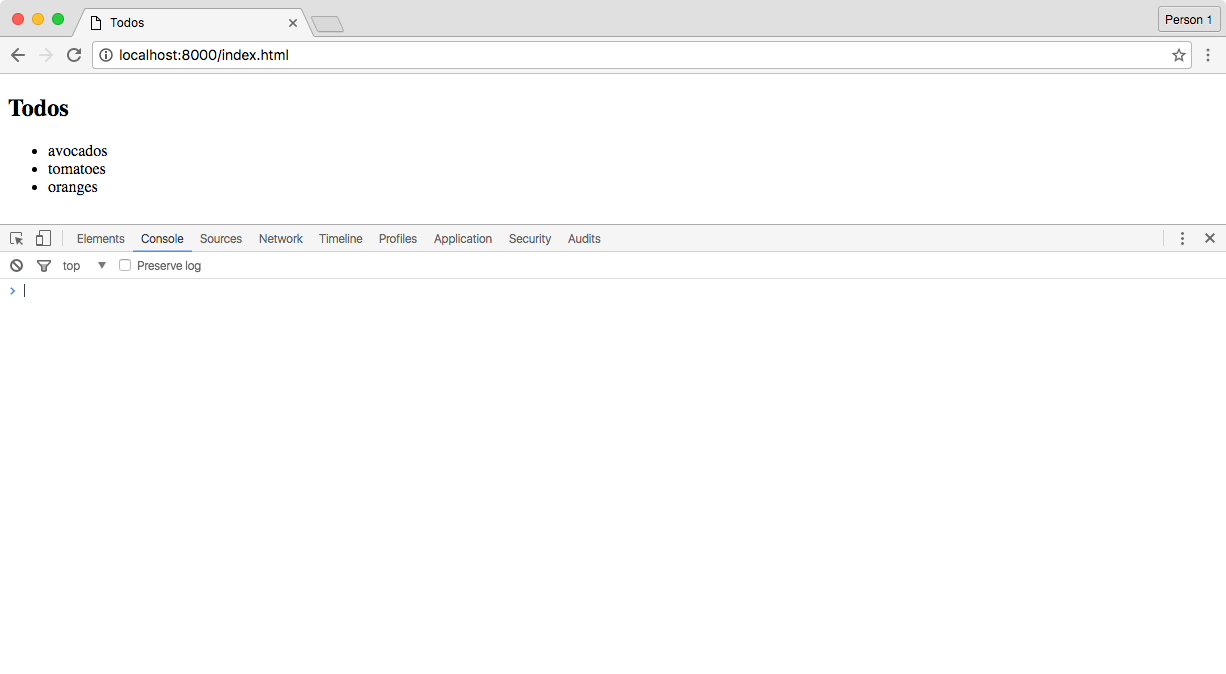
Reload the browser and you should see the list of tasks.