Running Couchbase Server Using Docker
Using the official Couchbase Server images on Docker Hub, it’s easy to get started with Couchbase Server on Docker containers.
If you’re trying Couchbase Server for the first time and just want to explore a Couchbase configuration, the quickest way to install a pre-configured single-node using Docker is to follow the Start Here! tutorial.
For more traditional Docker deployments, review the single-node and multi-node deployment instructions in this topic, which use the official Couchbase Docker images available on Docker Hub. The Official Couchbase Server containers on Docker Hub are based on Ubuntu 16.04.
Deploying a Single-Node Cluster
To run a single node cluster, you need to deploy a single Couchbase Server container representing the single node.
| Before you begin, review the Couchbase Server system requirements and deployment guidelines, paying particular attention to the guidelines for virtualized environments and About Deploying Clusters With Less Than Three Nodes. |
-
Download and install Docker on the host machine.
To set up Docker on the host system, go to the Docker installation page and follow the instructions.
-
Run the following command to install the Couchbase Server container:
docker run -d --name db -p 8091-8096:8091-8096 -p 11210-11211:11210-11211 couchbase
This command downloads and runs the container image that is tagged
latestfrom the official Couchbase repository on Docker Hub.The container image on Docker Hub is based on Ubuntu. If you want to install a container image that is based on Red Hat Enterprise Linux (RHEL), follow the instructions on the Red Hat Container Catalog to download the image, and then run the following command to install and run the container:
docker run -d --name db -p 8091-8096:8091-8096 -p 11210-11211:11210-11211 couchbase/server
If Couchbase Server is running locally on the machine without containers, the port mappings specified using the -poption may fail. Ensure that you stop any local instance of Couchbase Server before running the above command.You can check the Docker logs to verify that the container has started:
docker logs db
If the container has started, the output should start with the following:
Starting Couchbase Server -- Web UI available at http://<ip>:8091
...
-
From a Web browser, go to http://localhost:8091 to access the Couchbase Server Web Console. If the container is up and running, you should see the Couchbase Server Setup Screen.
-
Walk through the setup wizard to Create a Cluster of one node.
You may need to lower the RAM allocation for various services to fit within the bounds of the resource for the containers.
You can enable the
travel-sampleandbeer-samplebuckets to load some sample data.
This is all that is needed for a single node deployment of a Couchbase Server cluster with containers. Go to Next Steps.
Deploying a Multi-node Cluster with Docker
There are two popular topologies for multi-node Couchbase Server clusters:
-
All Couchbase Server containers on one physical machine
This model is commonly used for scale-minimized deployments that simulate production deployments for development and testing purposes.
-
Each Couchbase Server container on its own physical machine
This model is commonly used for production deployments. This is the only supported topology for production with Couchbase Server 4.5 and higher.
| Before you begin, review the Couchbase Server system requirements and deployment guidelines, paying particular attention to the guidelines for virtualized environments. |
Deploying all Couchbase Server containers on one physical machine
In this deployment model, all containers are placed on the same physical machine. Placing all containers on a single physical machine means all containers will compete for the same resources. That is okay for test systems, but it isn’t recommended for applications sensitive to performance.
The following example explains how to set up a three-node Couchbase Server cluster with all of the containers running on one physical machine:
-
Download and install Docker on the host machine.
To set up Docker on the host system, go to the Docker installation page and follow the instructions.
-
Run the following commands to install the Couchbase Server containers
db1,db2, anddb3:$ docker run -d --name db1 couchbase $ docker run -d --name db2 couchbase $ docker run -d --name db3 -p 8091-8096:8091-8096 -p 11210-11211:11210-11211 couchbaseThese commands download and run three instances of the container image that is tagged
latestfrom the official Couchbase repository on Docker Hub.The container image on Docker Hub is based on Ubuntu. If you want to install a container image that is based on Red Hat Enterprise Linux (RHEL), follow the instructions on the Red Hat Container Catalog to download the image, and then run the following command to install and run the container:
$ docker run -d --name db1 couchbase/server

$ docker run -d --name db2 couchbase/server

$ docker run -d --name db3 -p 8091-8096:8091-8096 -p 11210-11211:11210-11211 couchbase/server
If Couchbase Server is running locally on the machine without containers, the port mappings specified using the -poption may fail. Ensure that you stop any local instance of Couchbase Server before running the above command.If you are using encrypted communication for the Web Console, client, and server, and using XDCR, you need to open up additional ports. For details, see Network and Firewall Requirements. You can check the Docker logs to verify that each container has started:
$ docker logs db1

$ docker logs db2

$ docker logs db3
If the containers have started, the output of each of the above commands should start with the following:
Starting Couchbase Server -- Web UI available at http://<ip>:8091
...
-
Run the following commands to discover the local IP addresses of
db1anddb2:$ docker inspect --format '{{ .NetworkSettings.IPAddress }}' db1 $ docker inspect --format '{{ .NetworkSettings.IPAddress }}' db2You need the IP addresses of
db1anddb2to set up the three-node Couchbase Server cluster. The initial cluster setup will automatically pick up the IP address fordb3. -
From a Web browser, go to http://localhost:8091 to access the Web Console. If
db3is up and running, you should see the Couchbase Server Setup Screen.
-
Click Setup New Cluster and walk through the setup wizard to Create a Cluster as normal.
You may need to lower the RAM allocation for various services to fit within the bounds of the resource for the containers.
You can enable the
travel-sampleandbeer-samplebuckets to load some sample data. -
After the cluster is initialized on the first Couchbase Server node (
db3), the next step is to add the Couchbase nodes fromdb1anddb2to the cluster.-
In the Web Console, go to the Servers tab and click ADD SERVER. Enter the IP address that you previously captured for
db1, and click Add Server.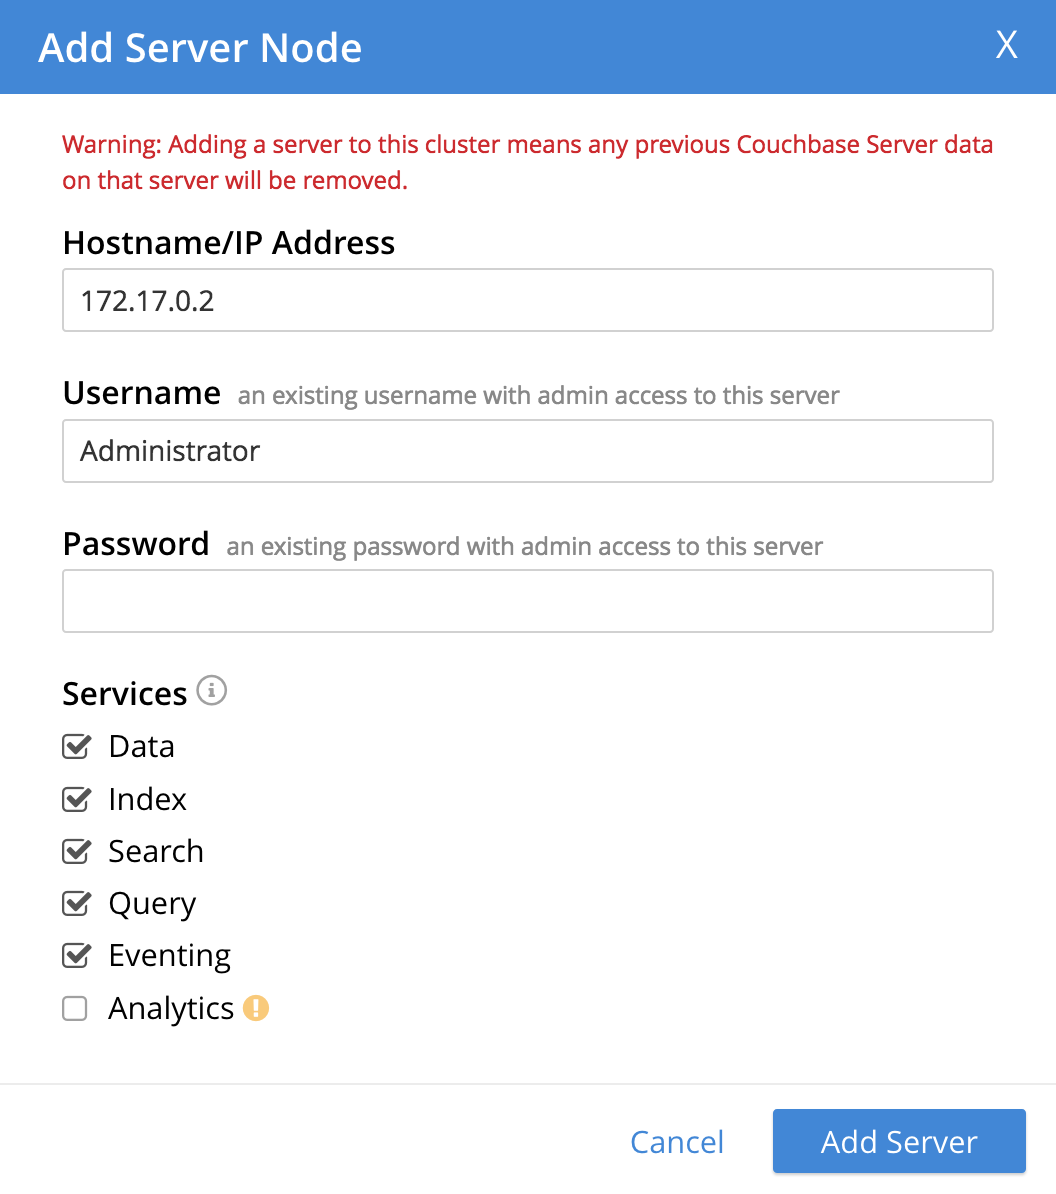
-
After
db1is successfully added, click ADD SERVER again. Enter the IP address that you previously captured fordb2, and click Add Server. -
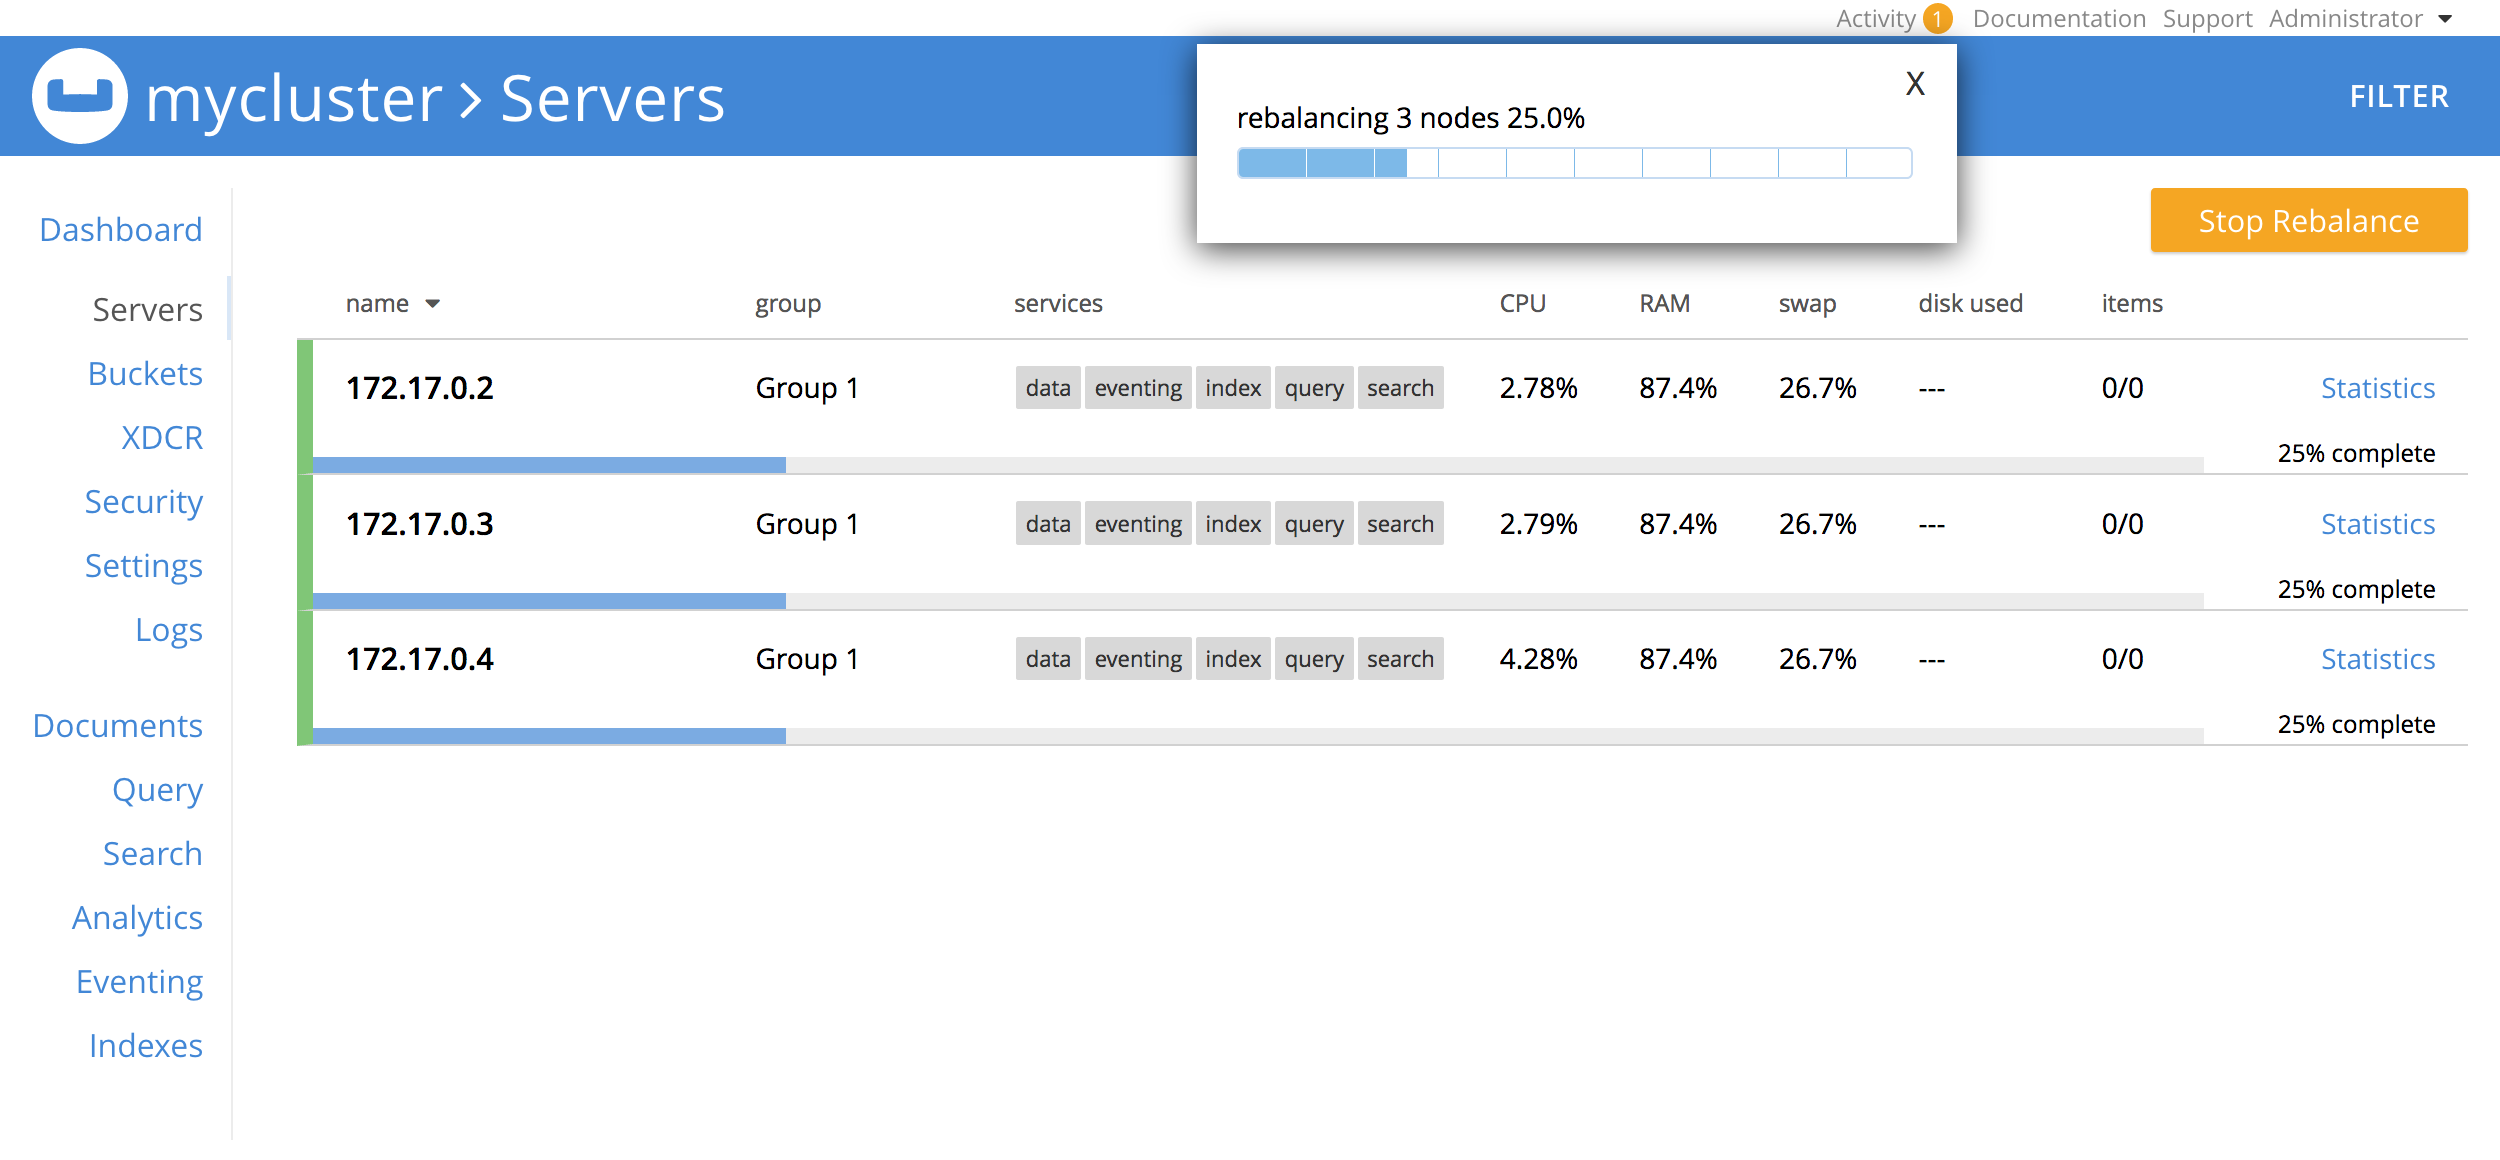
Click Rebalance.
-
This is all that is needed for a multi-node Couchbase Server cluster deployment with containers on a single physical machine. Go to Next Steps.
Deploying Couchbase Server Containers Across Many Physical Machines
In this deployment model, each container is placed on its own physical machine. This is the supported model for production deployments with Couchbase Server containers.
The following example explains how to set up a three-node Couchbase Server cluster with each Couchbase Server container running on its own physical machine:
-
Download and install Docker on each host machine.
To set up Docker on the host system, go to the Docker installation page and follow the instructions.
-
On all three physical hosts, start the Couchbase Server container,
db, using the following command:docker run -d --name db -v ~/couchbase:/opt/couchbase/var --net=host couchbase
This command downloads and runs the container image that is tagged
latestfrom the official Couchbase repository on Docker Hub. The-voption is recommended for better I/O performance and persists the data stored by Couchbase on the local host. The--net=hostoption provides better network performance and maps the host network stack to the container.The container image on Docker Hub is based on Ubuntu. If you want to install a container image that is based on Red Hat Enterprise Linux (RHEL), follow the instructions on the Red Hat Container Catalog to download the image, and then run the following command to install and run the container:
docker run -d --name db -v ~/couchbase:/opt/couchbase/var --net=host couchbase/server
You can check the Docker logs to verify that the container has started:
docker logs db
If the container has started, the output should start with the following:
Starting Couchbase Server -- Web UI available at http://<ip>:8091
...
-
On all three physical hosts, run the following command to discover the local IP addresses for each Couchbase Server container:
docker inspect --format '{{ .NetworkSettings.IPAddress }}' dbYou need the IP address of each container to set up the three-node Couchbase Server cluster.
-
On one of the physical hosts, open a Web browser and go to http://localhost:8091 or
http://<node-ip>:8091to access the Web Console. If the container is up and running, you should see the Couchbase Server Setup Screen.
Click Setup New Cluster and walk through the setup wizard to Create a Cluster as normal.
You can enable the
travel-sampleandbeer-samplebuckets to load some sample data. -
On the remaining physical hosts, open a Web browser and go to http://localhost:8091 or
http://<node-ip>:8091to access the Web Console. If the container is up and running, you should see the Couchbase Server Setup Screen.Click Join Existing Cluster, and walk through the setup wizard.
-
On the last physical host, after you join the cluster, go to the Servers tab and click Rebalance.
This all that is needed for a multi-node Couchbase Server cluster deployment with containers across multiple physical machines. Go to Next Steps.
Next Steps
Once you’ve successfully initialized a Couchbase Server cluster using containers, you can start querying Couchbase and connecting clients.
-
If you would like to practice querying on a new Couchbase Server cluster, log into the Web Console at http://localhost:8091 and go to the Query tab. If you don’t have any buckets set up yet, you can go to the Buckets tab and click sample bucket to load some sample data.
-
Connect via SDK
The SDKs communicate with Couchbase Server services over various ports using the name that is used to register each node in the Servers tab. Given that each node is registered using the IP address of the hosts, applications using the SDK can be run from any host that can reach the nodes of the cluster.
For single-node clusters, simply run your application through the Couchbase Server SDK on the host and point it to http://localhost:8091/pools to connect to the container.
For more information on deploying a sample application to a container, see travel-app:index.adoc.