Manage Users and Roles
Couchbase RBAC allows defined users to be assigned roles, which permit access to resources.
User-Creation Overview
Users, passwords, and roles can be managed by means of:
-
Couchbase Web Console (see below).
-
The CLI command cli:cbcli/couchbase-cli-user-manage.adoc.
-
The REST API method
/settings/rbac/users. See Role Based Admin Access.
Creating and Managing Users with the UI
Using Couchbase Web Console, you can assign roles to users interactively. The administrator who initially performs installation and configuration of Couchbase Server — the Full Administrator — is granted read-write access to the entire system. The user ID of this administrator can be either locally defined, or remotely; for example, by means of LDAP.
Once basic system-configuration has been completed, the Full Administrator is free to add additional administrators to the system, and assign them roles; thereby specifing their access-privileges.
Adding Users
As Full Administrator, to add users (each of which might be either an administrator or an application) to Couchbase Server, use the Couchbase Web Console. Access the Dashboard, and left-click on the Security tab, on the vertical navigation-bar, at the left. This brings up the Security view, as follows:
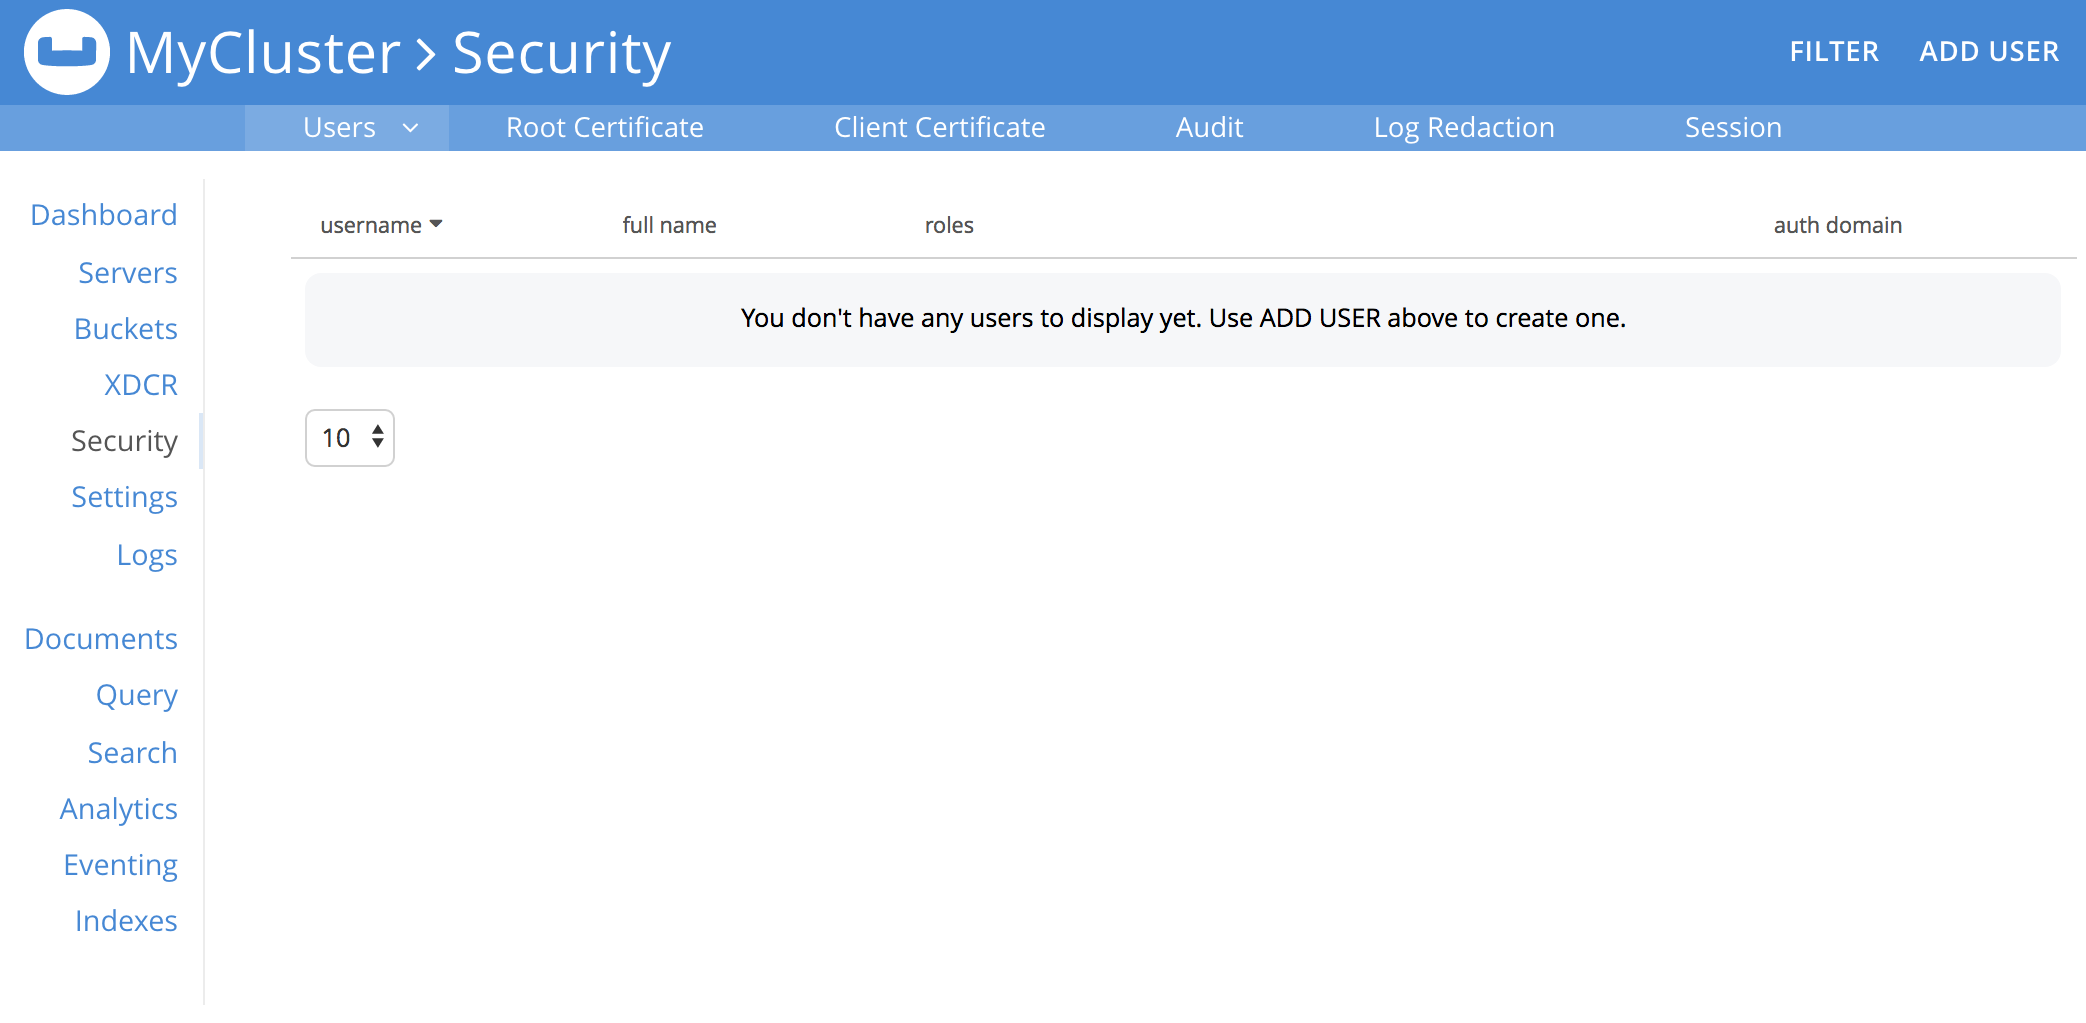
The Security view allows users to be defined, and roles to be allocated to them. It also allows management of the Root and Client certificates; of Audit-processing; of Log Redaction; and of Session timeouts. To add a user, left-click on the Add User control, at the upper right. The Add New User dialog now appears:
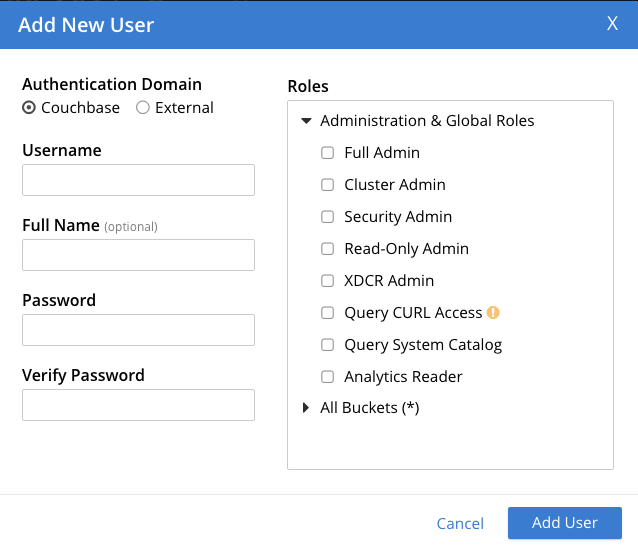
The Authentication Domain panel features two checkboxes: one specifying Couchbase, the other External. By default, Couchbase is checked: this means that the user will be defined locally, and that a user-password must therefore be created, using the Password fields displayed on the dialog. To define a user externally (for example, by accessing an LDAP server over the network), check the External checkbox. If you do so, no password need be specified, since one is assumed to have been defined elsewhere; and the Password fields therefore disappear from the dialog.
Define a Couchbase user, by adding appropriate entries into the Username and Password fields. The Full Name field may be left blank.
Adding Roles
Roles can be specified by checking checkboxes in the Roles panel:
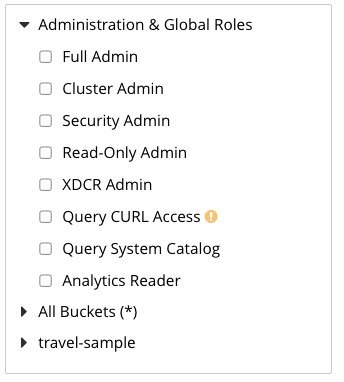
Roles are arranged in groups. The first group, which appears at the top of the panel, is for Administration & Global Roles: this roles are either administrative, or involve access to cluster-wide features. Subsequent groups appear below the first: each consists of roles that are applied per bucket. By default, a single subsequent group is displayed, All Buckets (). Each individual bucket on the cluster will be represented below *All Buckets ()*, with its own hierarchy of roles. This allows each individual user to be assigned roles either that apply to all buckets defined on the cluster, or to individual buckets. Left-click on the corresponding right-pointing arrowhead to display a group’s contents, scrolling down if necessary:
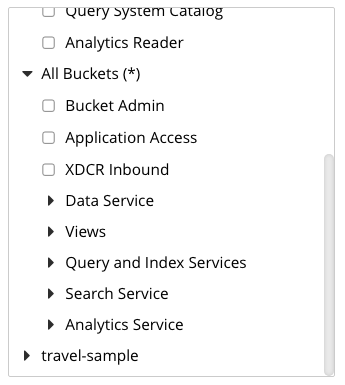
To display roles at lower levels of the All Buckets ()* hierarchy, left-click on the right-pointing arrowheads.
To assign roles to the user, simply check the appropriate checkboxes. Then, left-click on the Add User button, at the lower right.
Note that some roles are considered to be subsets of others. In such cases, manually checking one checkbox may trigger the automated checking of others — indicating that the corresponding roles are also assigned to the user. To demonstrate this, left-click on the Full Admin checkbox, near the top. The Roles panel now appears as follows:
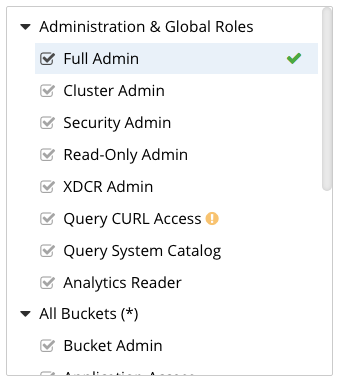
As illustrated, selecting the Full Admin role causes all other roles also to become selected: this is because Full Admin stands at the top of the hierarchy, and is a superset of all other roles.
Saving and Making Changes
Whenever you have finished allocating roles to a particular user, left-click on Add User. The dialog disappears, and the Security view now displays, on the row of the corresponding username, the roles you have allocated. For example, if you have allocated Data Reader and Data Writer on travel-sample, the view is as follows:

Note that by left-clicking within the row, you display options for editing:
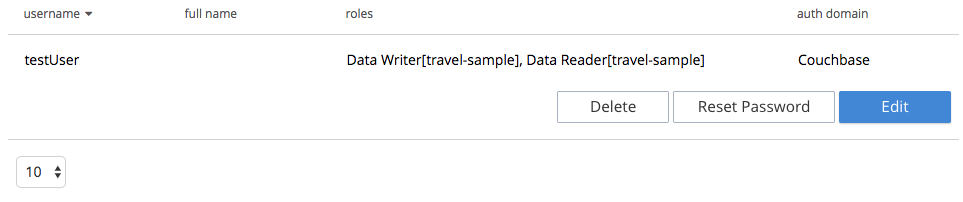
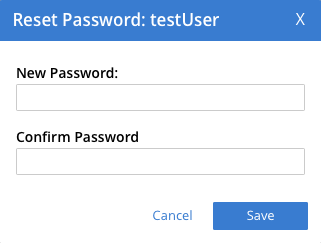
By left-clicking on Delete, you delete the user. By left-clicking on Edit, you bring up the Edit testUser dialog, with the options to redefine username, full name, and roles (the content of this dialog is very similar to that of the Add New User dialog, examined in detail above). The Reset Password button only appears when the selected user is locally defined. Left-clicking on the button brings up a dialog that allows redefinition of the user’s password:
For a complete account of the roles you can allocate and their significance, see Roles.