Create a Bucket
Full and Cluster Administrators can use the Couchbase Web Console, CLI, or REST API to create a bucket: this section takes you through the procedure provided by the Couchbase Web Console, step by step.
Create a Bucket Using the Couchbase Web Console
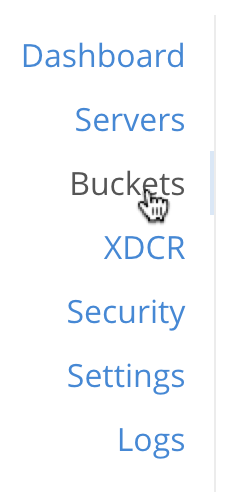
Access the Couchbase Web Console, and left-click on the Buckets tab, in the vertical navigation-bar at the left-hand side:
The Buckets screen now appears, showing the buckets that have already been defined for your system. If you are accessing this screen immediately after cluster-initialization, no buckets are yet defined:
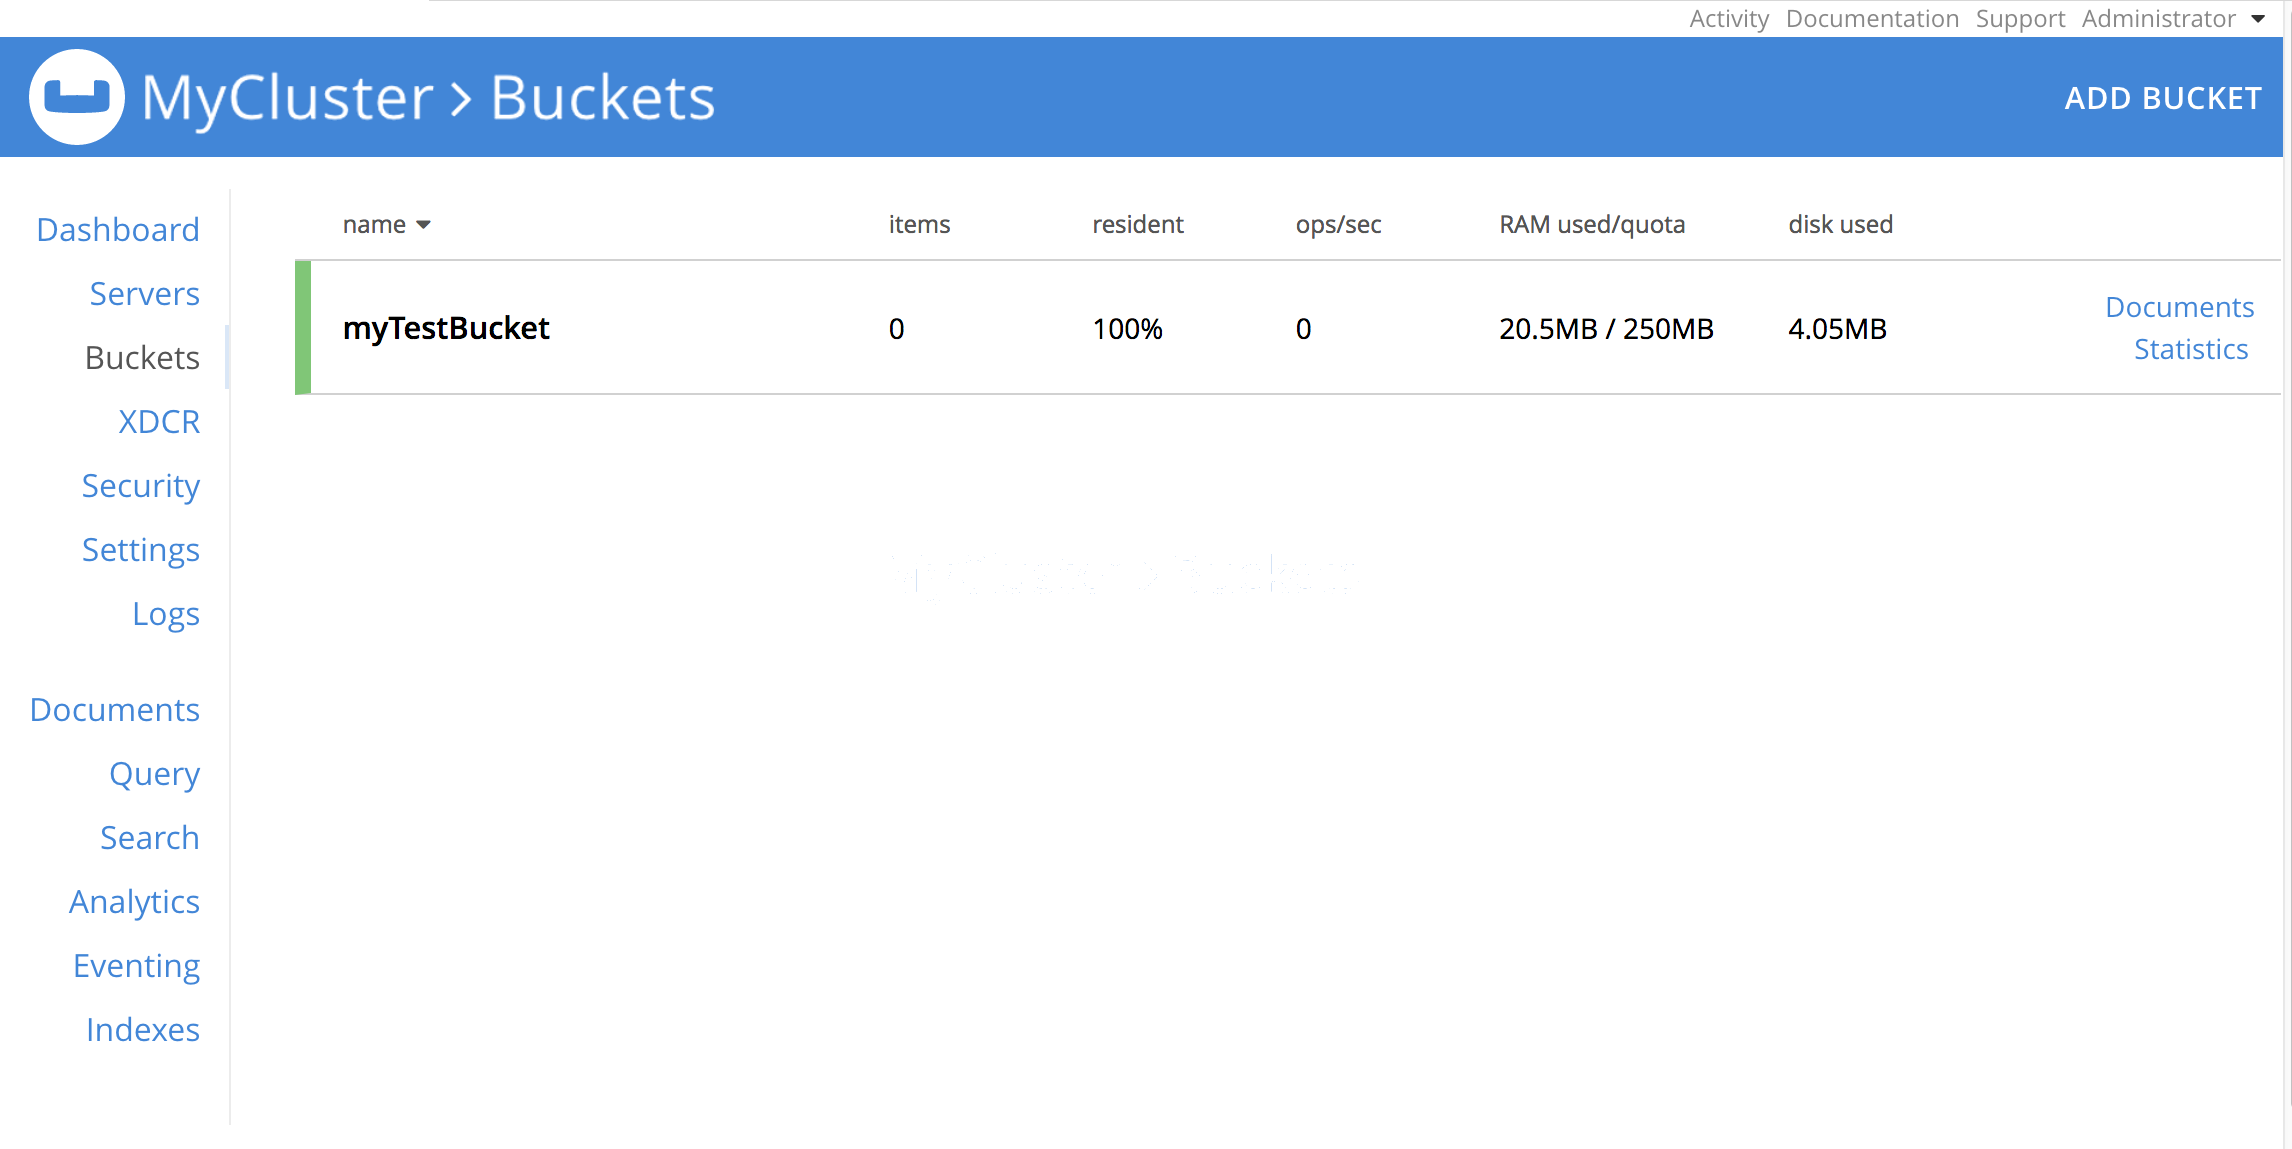
To create a new bucket, left-click on the Add Bucket button, at the upper-right:

This brings up the Add Data Bucket dialog, which appears as follows:
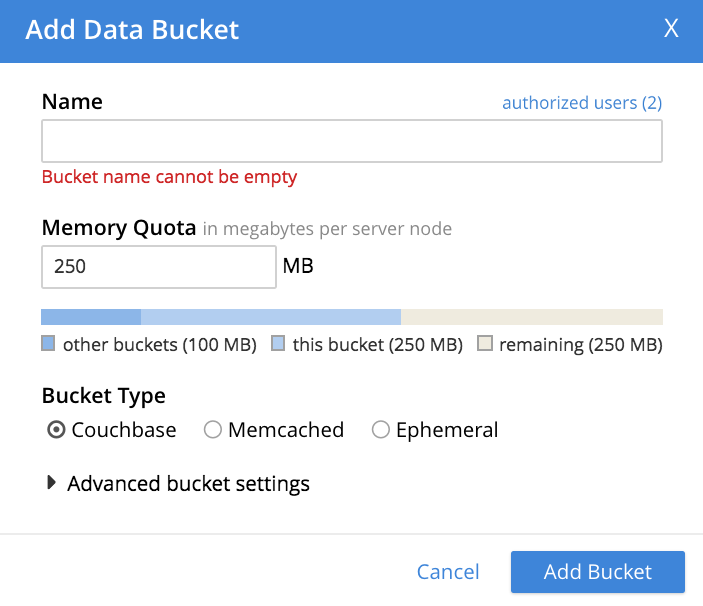
Enter a bucket-name into the interactive Name text-field. A bucket name can only contain characters in the ranges of A-Z, a-z, and 0-9; with the addition of the underscore, period, dash and percent characters; and can be no more than 100 characters in length.
Next, specify an appropriate memory quota for your bucket, in the Memory Quota field: either enter a figure by typing at the keyboard; or, with the mouse, access the arrow-icons at the right-hand side of the interactive text-field, to increment or decrement the default value. The quota you specify is allocated for your bucket on a per node basis. The value you enter must fit with the overall cluster RAM quota. The cluster quota is displayed as a figure; and also graphically, as a horizontal display-bar. The bar provides size-information for the bucket you are creating, for the amount of memory already added to other buckets, and for the amount currently free.
Note that the bucket RAM-quota you have established can be dynamically altered after bucket-creation, provided that cluster-resources are sufficient.
Now, proceed to establish advanced settings for your bucket.
Establish Advanced Bucket Settings
Three Bucket Type options are displayed: which are Couchbase, Memcached, and Ephemeral. For information on the differences between these bucket-types, see Buckets.
Selection of each bucket-type provides a different set of advanced settings, which can be used to configure the bucket. The bucket-type selected by default is Couchbase. Therefore, to see the advanced settings associated with this bucket-type, left-click on the right-pointing arrowhead labelled Advanced bucket settings. This causes the Add Data Bucket dialog to expand vertically, as shown below.
Couchbase Bucket-Settings
The advanced bucket-settings for the Couchbase bucket-type are as follows:
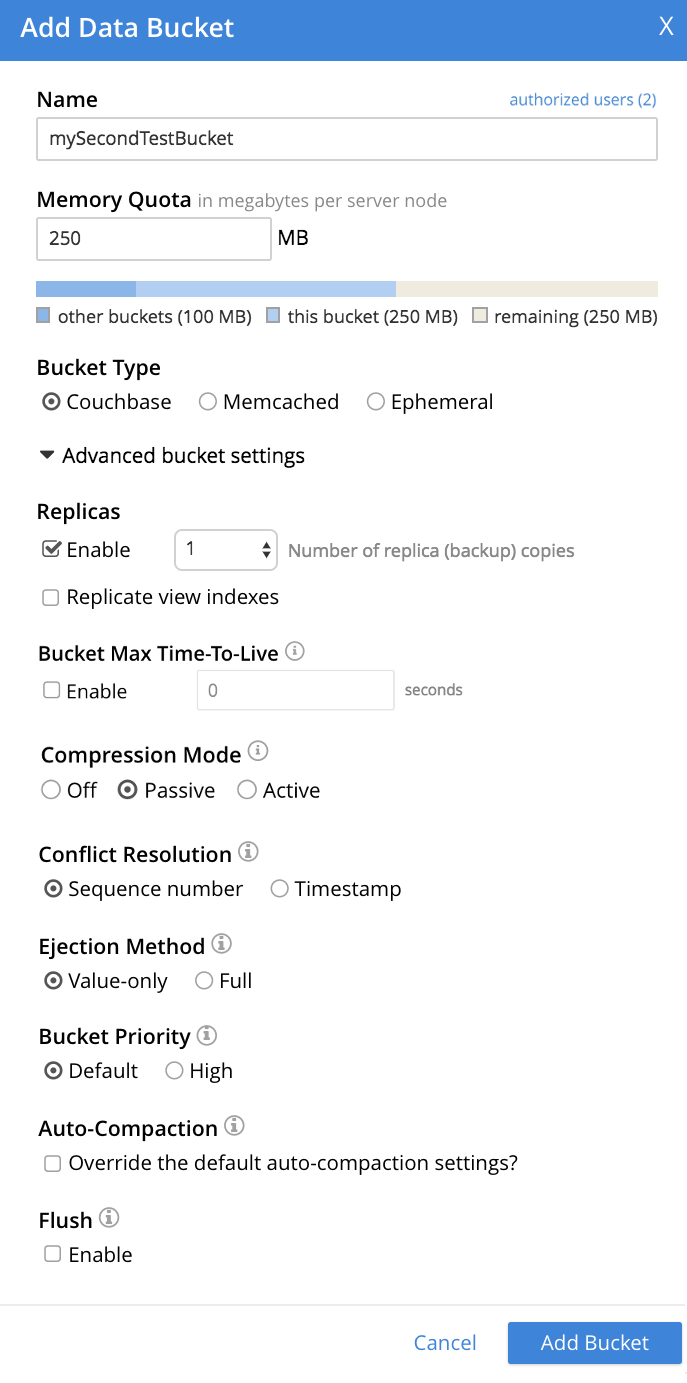
The fields are as follows:
-
Replicas: Allows replica-creation to be enabled and managed. To enable, check the Enable checkbox. The number of replica-copies to be created and maintained is determined by means of the Number of replica (backup) copies pulldown menu, which allows a value from 1 to 3 to be selected.
By checking the Replicate view indexes checkbox, you ensure that view indexes, as well as data, are replicated.
-
Bucket Max Time-To-Live: If the Enable checkbox is checked, the integer specified in the seconds field determines the maximum time a document can exist, following its creation within this bucket, before being deleted. The maximum time that can be specified is 2147483648 (68.096 years). The setting is applied to all documents created after the setting is itself established.
For detailed information, see Expiration.
-
Compression Mode: Controls whether and how compression is applied to data within the bucket. For detailed information, see Compression.
-
Conflict Resolution: A conflict occurs during XDCR, when a document has been modified in different ways in different locations; necessitating that one of the versions be chosen for retention, and the other discarded. There are two methods for making this choice: these are represented by the Sequence number and Timestamp checkboxes. The method you choose is permanently established for the current bucket: it cannot subsequently be changed. For information on the significance of each method, see XDCR Conflict Resolution.
Note that you can also set the conflict resolution method using the CLI cli:cbcli/couchbase-cli-bucket-create.adoc command, or the REST API.
-
Ejection Method: For Couchbase buckets, the options are Value-only and Full. If Full is selected, everything (including data, metadata, key, and value) is ejected. If Value-only is selected, only data is ejected. Generally, Value-only ejection favors performance at the expense of memory; and Full ejection vice versa. See Ejection, for more information. Note that ejection in the context of a Couchbase bucket means removal from memory, with continued persistence on disk.
-
Bucket Priority: Allows you to specify the priority of the current Couchbase bucket’s background tasks, relative to the background tasks of other buckets on the cluster. Background tasks may involve disk I/O, DCP stream-processing, item-paging, and more.
Radio-buttons allow Default or High to be chosen. These settings determine whether the bucket’s tasks are enqueued in low or high priority task-queues. Specifying High may result in faster processing for the current bucket’s tasks. However, the specification only makes a difference when there is more than one bucket defined for the cluster, and when those buckets are assigned different priority-values. See Data Service, for further information.
-
Auto-Compaction: Allows triggering of the process whereby data and indexes are compacted automatically on a system-defined schedule, to save space. To override the default settings, check the checkbox marked Override the default auto-compation settings? If you do so, the dialog goes through a further vertical expansion; and additional fields are displayed, whereby you can specify your own compaction-settings. For information on the defaults, and on the options provided for overriding them, see Configuring Auto-Compaction.
-
Flush: This section allows flushing to be enabled. If it is enabled, and flushing is performed, items in the bucket are removed as soon as possible. See Flush a Bucket, for details.
Memcached Bucket-Settings
To see advanced settings for a Memcached bucket, check the Memcached checkbox. The advanced settings now appear as follows:
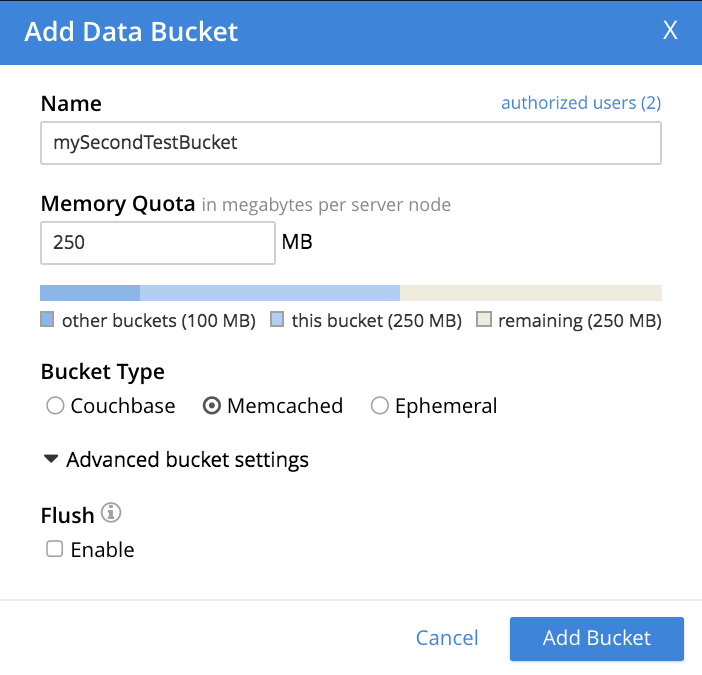
The only advanced setting that applies to Memcached is Flush, whose function is identical to that described above for Couchbase buckets.
Ephemeral Bucket-Settings
To see advanced settings for an Ephemeral bucket, check the Ephemeral checkbox. The advanced settings now appear as follows:
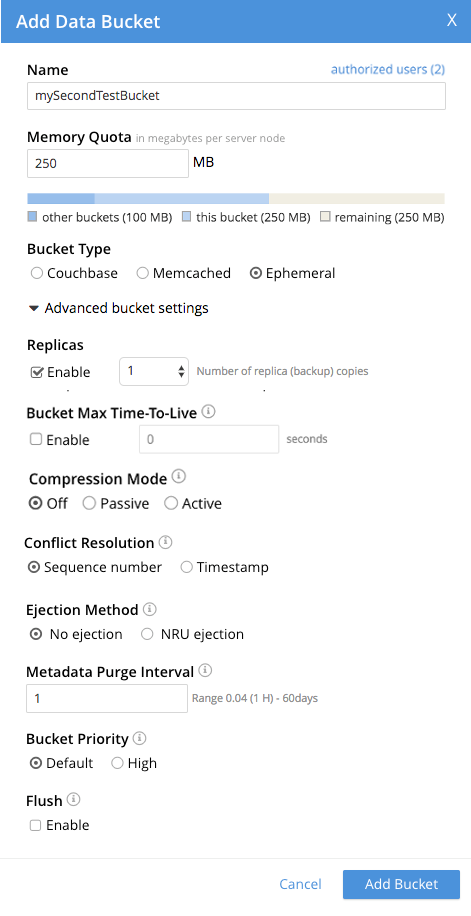
The settings Conflict Resolution, Bucket Max Time-to-Live, Compression Mode, and Flush are identical in functionality for both Ephemeral and Couchbase buckets.
The following settings are different for Ephemeral buckets:
-
Replicas: The Replicate view indexes checkbox is not available for Ephemeral buckets: it is available for Couchbase buckets only.
-
Bucket Priority: Background tasks exclude disk I/0, since this is not applicable to Ephemeral buckets.
-
Ejection Method: For Ephemeral buckets, the options are No ejection and NRU ejection. If No ejection is selected, no ejection of existing data occurs, and attempts to cache new data fail. If NRU ejection is selected, existing data is ejected, with Not Recently Used documents being those removed. Note that ejection when applied to an Ephemeral bucket means removal of bucket-data from memory without persistence (since ephemeral buckets have no presence on disk).
-
Metadata Purge Interval: This setting, here provided at the top level of the user interface for Ephemeral buckets, was made visible for Couchbase buckets only by checking the Auto-Compaction checkbox. See Configuring Auto-Compaction for information on how to use this setting.
Bucket Creation Status-Update
After the bucket creation is completed, you can get a status-update by any of the following procedures:
-
Examine the Buckets screen within the Couchbase Web Console. The newly created bucket is displayed:

-
Send a GET or any other command to the memcached on the created bucket. If you receive the response
ETMPFAIL, try the command later. -
Monitor the ep-engine bucket stats on one of the nodes. The bucket is created when the stat
ep_degraded_modechanges fromtruetofalse. -
Monitor /pools/default/buckets/<bucketname> or /pools/default/bucketsStreaming/<bucketname>. The bucket is created when all node statuses turn from
warmuptohealthy.
Using the CLI or REST API
You can also create a bucket using either the Couchbase Server CLI command cli:cbcli/couchbase-cli-bucket-create.adoc, or the REST API command rest-bucket-create.