Add a Node and Rebalance
A new Couchbase Server node can be added to an existing cluster.
Understanding Node-Addition
Full and Cluster administrators can use the UI, CLI, or REST API to add Couchbase Server nodes to existing clusters. On each node to be added, Couchbase Server must have been installed and started. The process of node-addition grants to the new node the settings already established for the parent cluster. (See Manage Settings for details.) The process allow services to be assigned to the new node. If the new node was previously initialized with custom disk-paths, these are retained. All aspects of provisioning that may previously have occurred on the new node are eliminated: this includes buckets, services, and settings.
Following node-addition, rebalance is required, to make the new node and active member of the cluster.
Examples on This Page
The examples in the subsections below show how to add the same node to the same one-node cluster; using the UI, the CLI, and the REST API respectively. The examples assume:
-
A one-node cluster already exists; and is named after its IP address:
10.142.181.101. It is running the Data, Query, and Index services, and has thetravel-samplebucket installed. (To access and install this, see Sample Buckets.) -
A new node has been started. This is named after its IP address:
10.142.181.101. It has not been initialized or provisioned. -
The cluster has the Full Administrator username of
Administrator, and password ofpassword.
Add a Node with the UI
Proceed as follows:
-
Bring up Couchbase Web Console, and log into cluster
10.142.181.101, using the Full Administrator username and password. Access the Servers tab, in the left-hand navigation bar: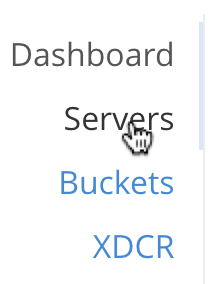
The Servers screen for the cluster is now displayed:

This shows the name of the sole node in the cluster,
10.142.181.101, plus additional information, including the services hosted. -
Ensure that the node to be added has been started. This can be accomplished by checking the IP address and port number for the new node in the address bar of the browser. The following interface is displayed:
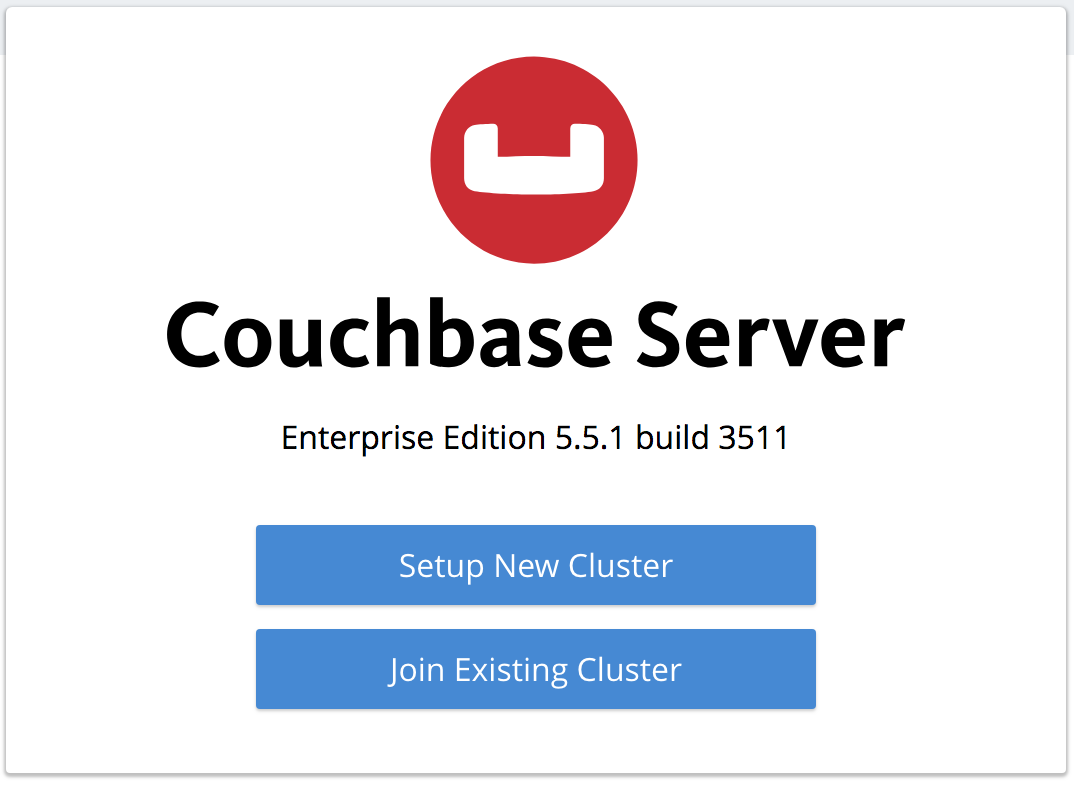
This indicates that Couchbase Server is installed and running on the new node, but has not yet been provisioned. Do not use this interface: instead, return to Couchbase Web Console for the cluster,
10.142.181.101. -
In the Servers panel for the cluster, left-click on the ADD SERVER button, at the upper right:

The Add Server Node dialog is now displayed:
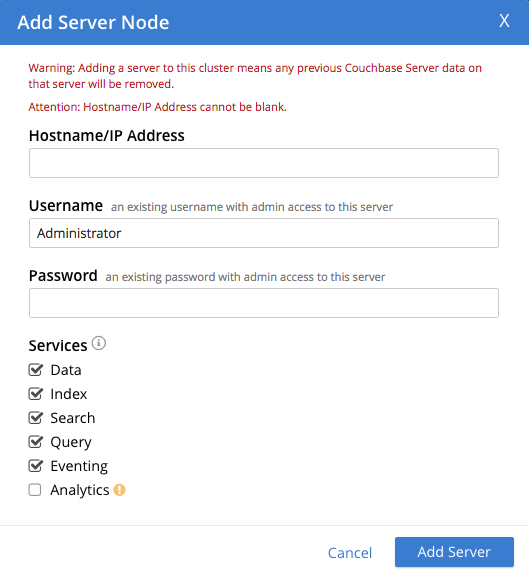
Note the warning provided at the top of the dialog: if the node to be added has already been provisioned, the results of such provisioning will be eliminated and replaced on the node’s addition to the current cluster. (In fact, the node to be added in this example, has neither been initialized nor provisioned.)
-
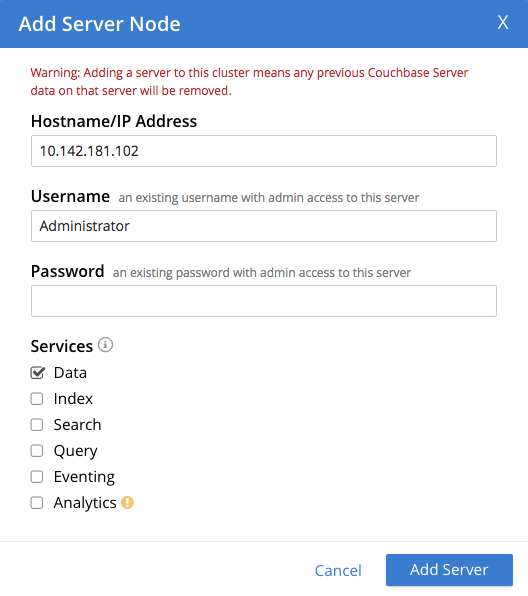
Specify the IP address of the node to be added. There is no need to specify a password, since the node has not yet been provisioned with one. Uncheck all of the Services check-boxes except Data. The dialog now appears as follows:
Left-click on the Add Server button to save. The Servers screen is redisplayed, with the following appearance:
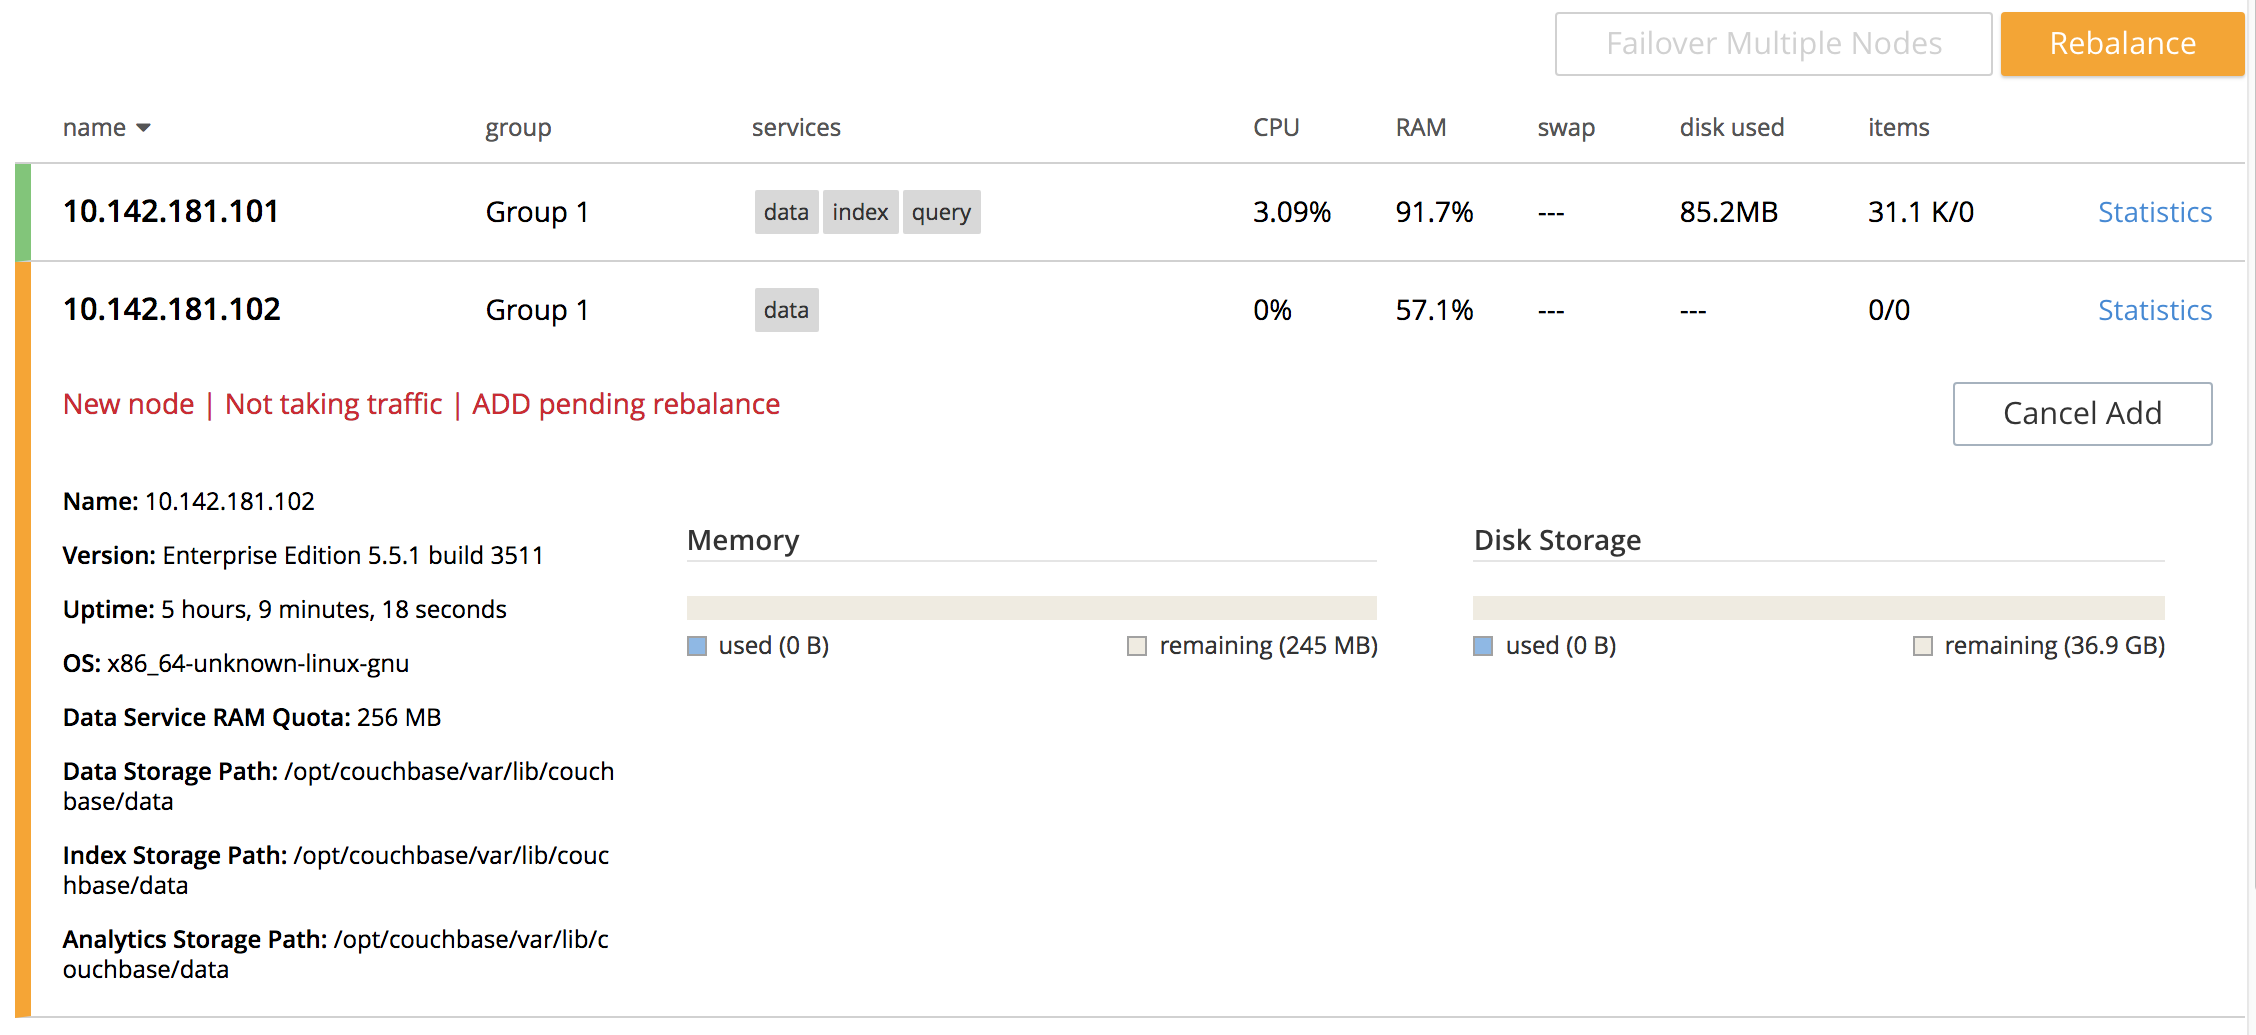
This indicates that the new node,
10.142.181.102has been successfully added. However, it is not yet taking traffic, and will be added following a rebalance. Note, at this point, the figure under the Items column for for10.142.181.101: this is31.1 K/0, which indicates that the node contains 3.1 K items in active vBuckets, and 0 items in replica vBuckets. Meanwhile, the Items figure for10.142.181.102is 0/0, indicating that no items are yet distributed onto that node in either active or replica form.To access information on buckets, vBuckets, and intra-cluster replication, see the Architecture Overview.
-
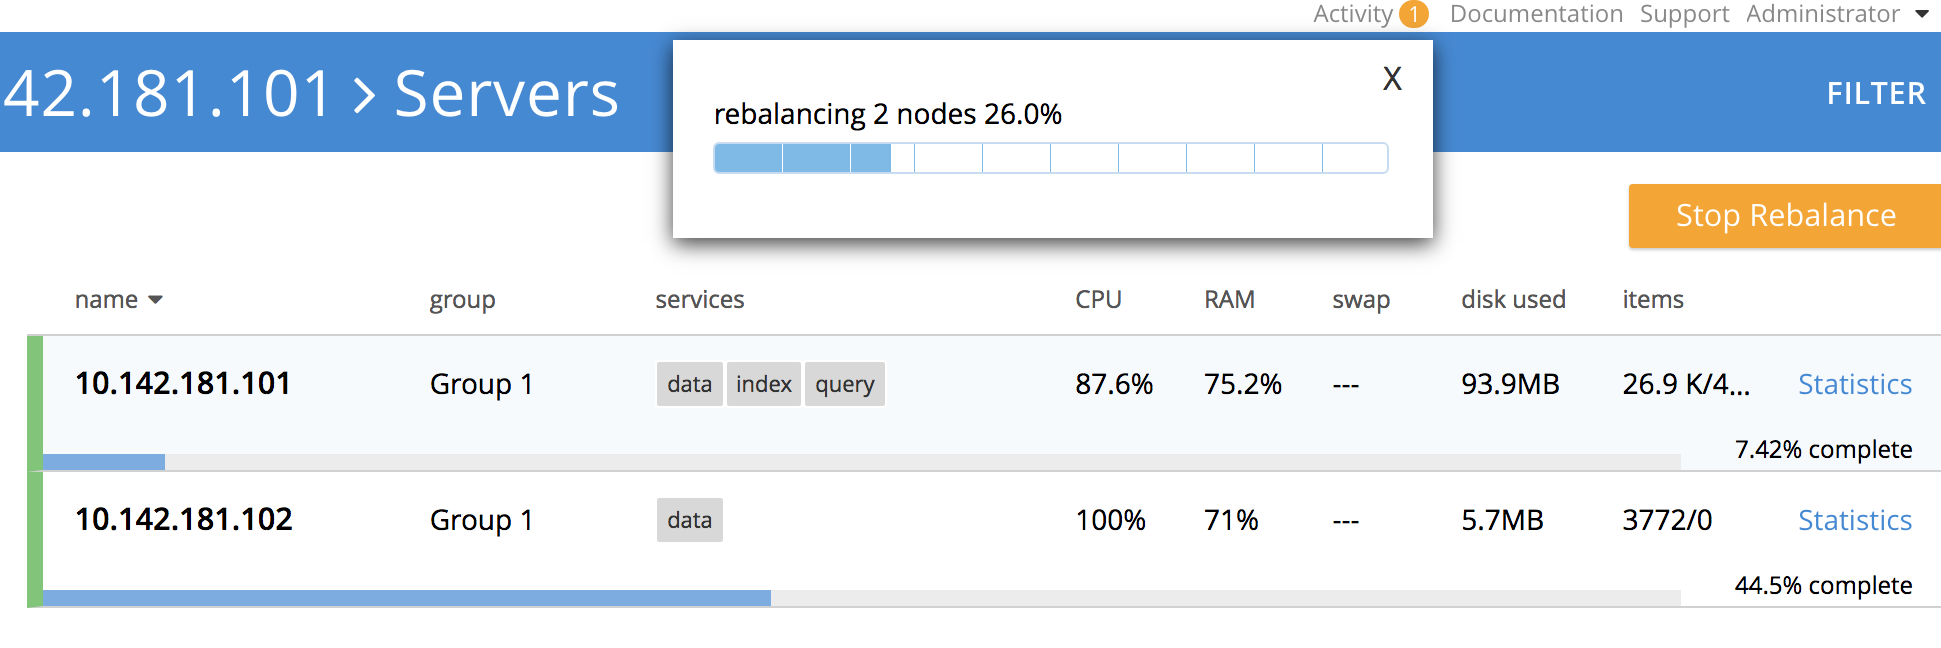
To perform a rebalance, left-click on the Rebalance button, at the upper right:

The new node is rebalanced into the cluster, meaning that whatever active and replica vBuckets were previously distributed across the original cluster nodes are redistributed across the superset of nodes created by the addition. A progress bar is shown at the top, and each row has its own progress bar, to indicate its ongoing workload:
Whent the rebalance is complete, Servers screen now appears as follows:
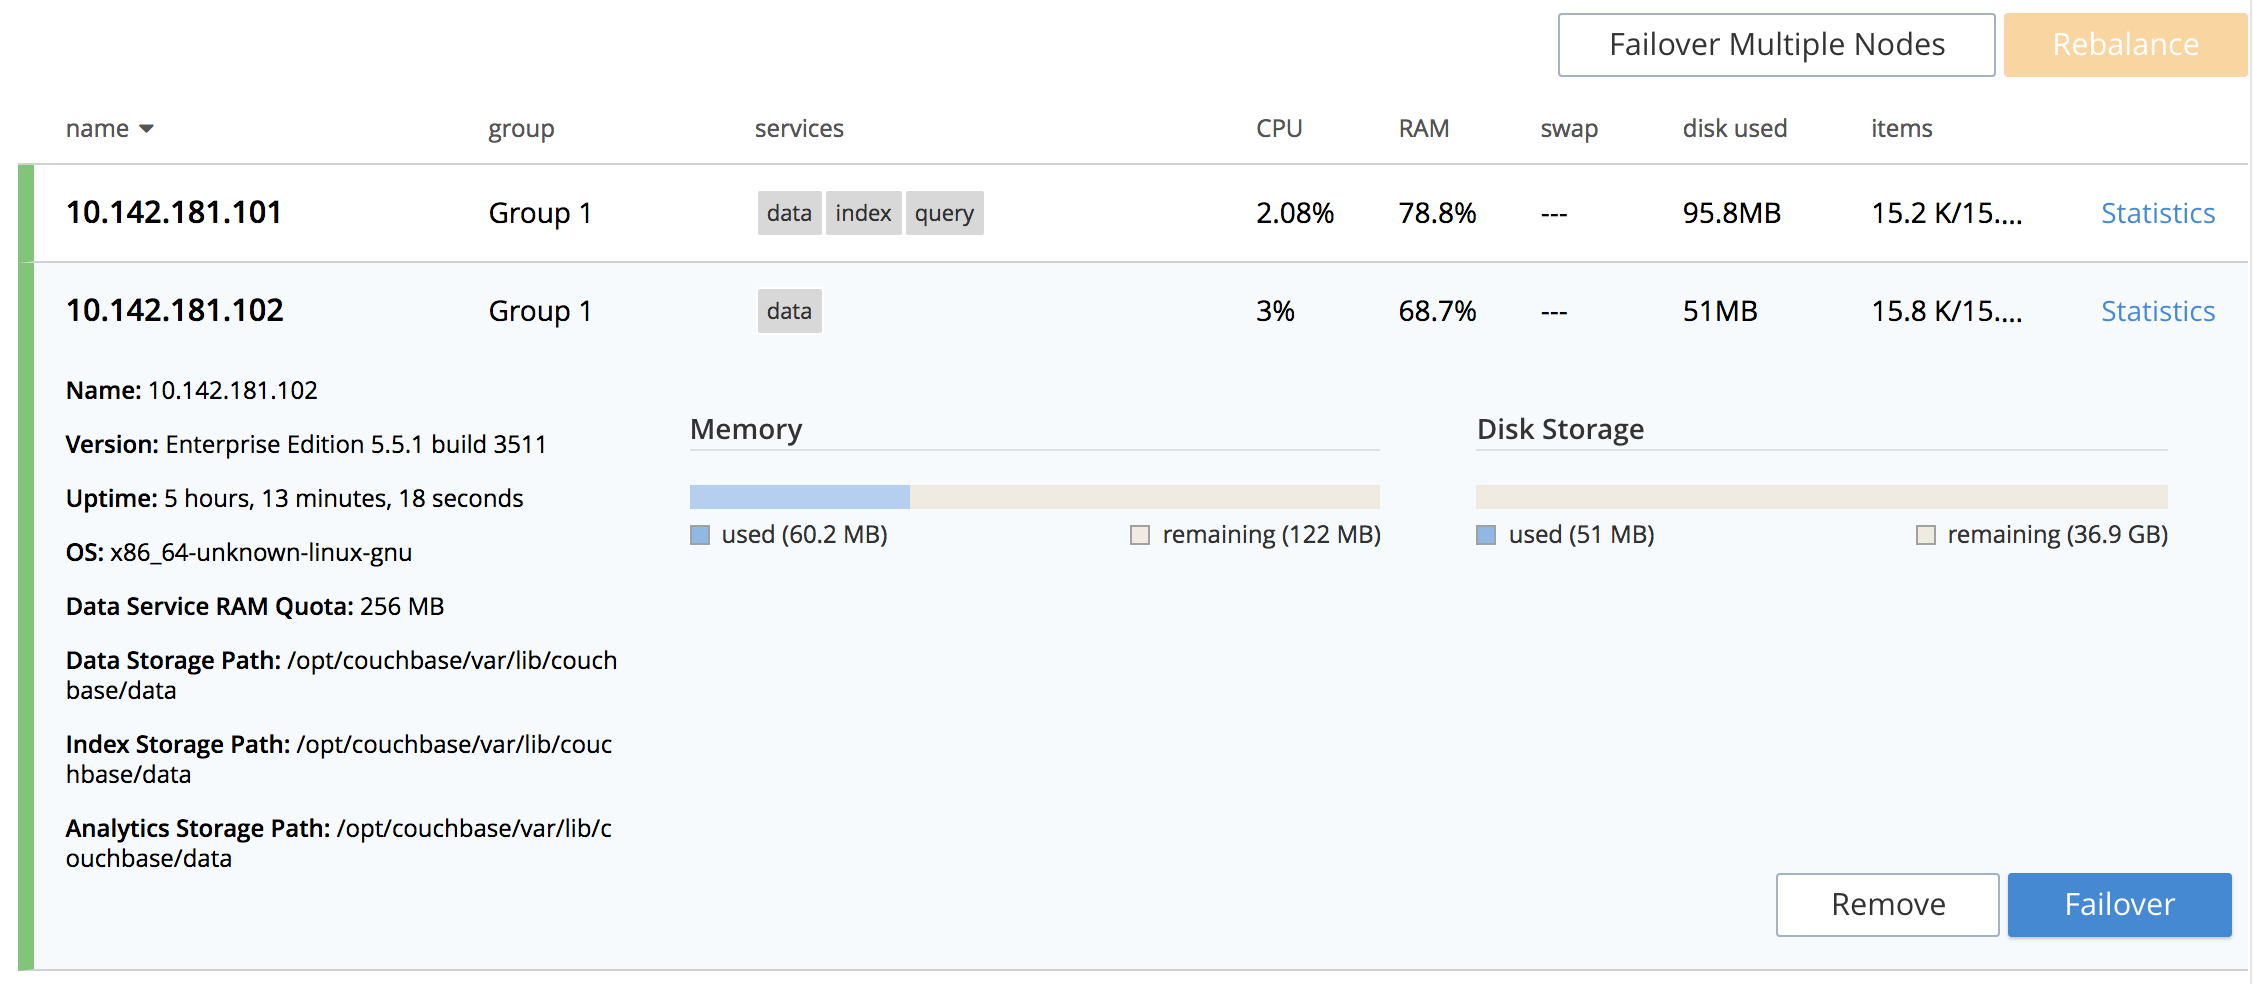
This indicates that cluster
10.142.181.101now contains two fully functioning nodes, which are10.142.181.101and10.142.181.102. (Note that the figure in the Items column for node10.142.181.101is15.2 K/15.8 K, which indicates that 15.2 K items are stored on the node in active vBuckets, and 15.8 K in replica vBuckets. The figure for10.142.181.102indicates the converse. Therefore, replication has successfully distributed the contents oftravel-sampleacross both nodes, providing a single replica vBucket for each active vBucket.)
Add a Node with the CLI
To add a new Couchbase Server-node to an existing cluster, use the cli:cbcli/couchbase-cli-server-add.adoc command.
Note that this command requires that arguments be provided for its --server-add-username and --server-add-password flags.
In this case, meaningful arguments do not exist, since the new node features an instance of Couchbase Server that is running, but has not been provisioned with a username or password.
Therefore, specify placeholder arguments. Additionally, specify that the data service be run on the node, once it is part of the cluster.
couchbase-cli server-add -c 10.142.181.101:8091 --username Administrator \
--password password --server-add 10.142.181.102:8091 \
--server-add-username someName --server-add-password somePassword \
> --services data
If successful, the command returns the following:
SUCCESS: Server added
The newly added node must now be rebalanced into the cluster. Use the cli:cbcli/couchbase-cli-rebalance.adoc command:
couchbase-cli rebalance -c 10.142.181.101:8091 \
--username Administrator \
--password password
During rebalance, progress is displayed as console output:
Rebalancing
Bucket: 01/01 (travel-sample)                      60714 docs remaining
[=====                                                          ] 4.56%
If successful, the command returns the following:
SUCCESS: Rebalance complete
Note that when the operation is highly complex, it may be desirable to get status on its progress, or stop the operation. See the command reference for cli:cbcli/couchbase-cli-rebalance-status.adoc and cli:cbcli/couchbase-cli-rebalance-stop.adoc, for more information.
Add a Node with the REST API
To add a new Couchbase Server-node to an existing cluster, use the /controller/addNode URI.
The following command adds node 10.142.181.102 to cluster 10.142.181.101:
curl -u Administrator:password -v -X POST \
10.142.181.101:8091/controller/addNode \
-d 'hostname=10.142.181.102&user=someName&password=somePassword&services=kv'
Note that the argument passed for services is kv, which signifies the Data Service.
As with the CLI command shown above, a username and password are expected, even though in this case, the new node has not been provisioned: therefore, placeholders are used. If successful, the command returns the name of the newly added node:
{"otpNode":"ns_1@10.142.181.102"}
The newly added node must now be rebalanced into the cluster. Use the /controller/rebalance URI, as follows:
curl -u Administrator:password -v -X POST \
10.142.181.101:8091/controller/rebalance \
-d 'knownNodes=ns_1@10.142.181.101,ns_1@10.142.181.102'
Note that the knownNodes argument lists each of the nodes in the cluster.
If successful, the command returns no output.
For further information on adding nodes with the REST API, see Adding Nodes to Clusters; on rebalancing, see Rebalancing Nodes.
Prioritizing Buckets During Rebalance
The REST API allows buckets to be prioritized during rebalance, so that one particular bucket can be handled before any others.
The example on this page features a cluster with only one bucket, so such prioritization has no effect.
However, if multiple buckets are installed (say, the beer-sample and gamesim-sample buckets, as well as travel-sample), any one of them could be prioritized for rebalance by means of the /diag/eval URI, specified before rebalance occurs.
The following example prioritizes travel-sample for rebalance:
curl --data "NameToTop = \"travel-sample\", Buckets = \
ns_bucket:get_buckets(), \
MyB = {_, _} = lists:keyfind(NameToTop, 1, Buckets), \
NewBuckets = [MyB | lists:keydelete(NameToTop, 1, Buckets)], \
ns_config:update_key(buckets, fun ([{configs, Buckets}]) -> \
[{configs, NewBuckets}] end)." \
-u Administrator:password http://10.142.181.101:8091/diag/eval
If successful, this receives an ok response. Rebalance can now be performed in the standard way, with the travel-sample bucket rebalanced before any other:
curl -u Administrator:password -v -X POST \
10.142.181.101:8091/controller/rebalance \
-d 'knownNodes=ns_1@10.142.181.101,ns_1@10.142.181.102'
Next Steps
As well as supporting a cluster’s adding a node to itself, Couchbase Server also supports a node’s joining itself to a cluster (which is essentially the same operation, but proceeding from the node, rather than from the cluster). See Join a Cluster and Rebalance for details.